

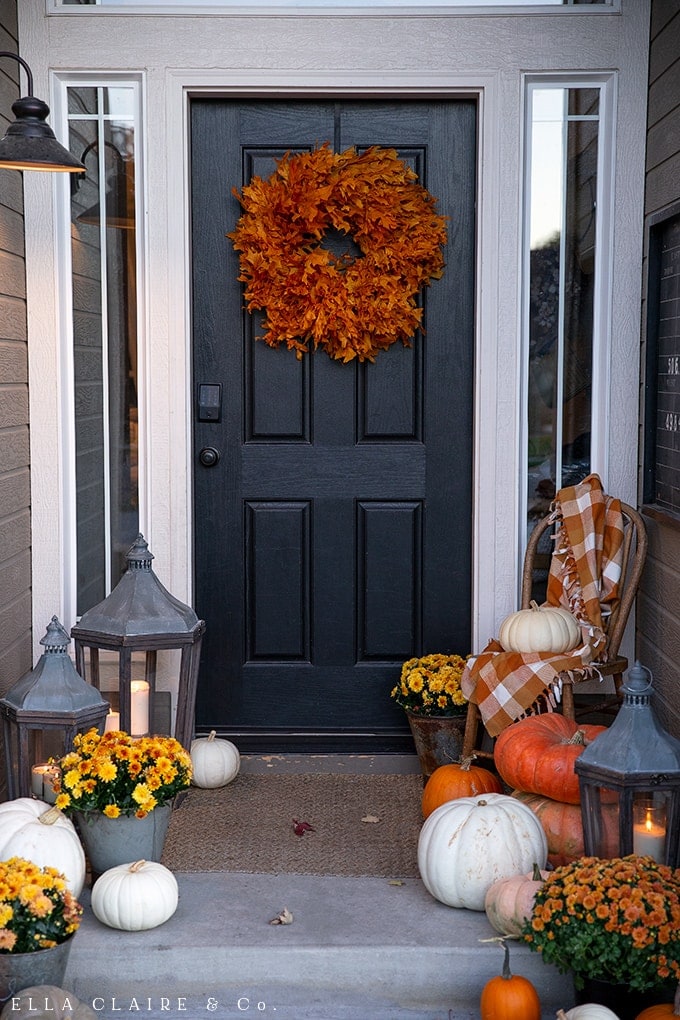
Create a stunning, full and lush, preserved leaf Autumn wreath for your front door or anywhere in your fall home decor with this easy DIY tutorial.
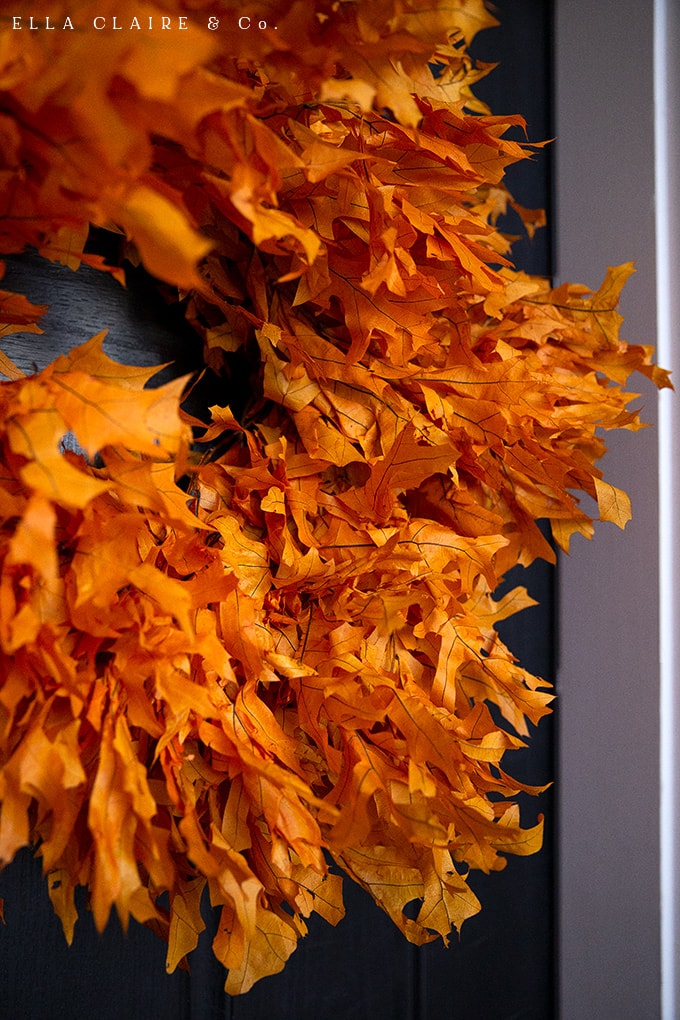
I have had many of you ask for the tutorial for this easy DIY preserved leaf fall wreath, and I am excited to share it with you today! I think you will be surprised just how easy it is to make and how beautiful it is in person. It seems like most of the wreaths you find at the store are a bit on the skimpy side, but this one is very full and lush. It has great depth and texture to it and looks so expensive in person (even though it is pretty reasonably inexpensive). I used preserved leaves, so I will be reusing this wreath again and again.
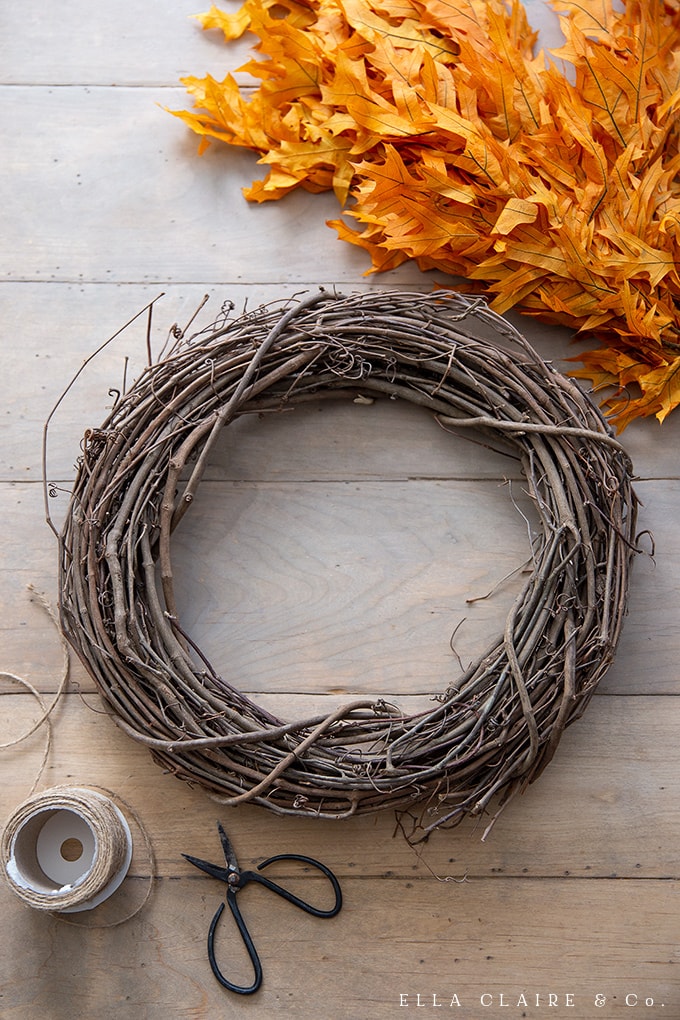
Supplies
- 12" grapevine wreath (this is a good deal HERE)
- Twine (find at any hardware store or HERE)
- Preserved leaves still on their branches (see below for a DIY or some online buying options)
- Scissors
- Wreath Hanger (15" HERE or 12" HERE)
DIY Preserved Fall Leaves vs. Buying Them
There are a few options for gathering leaves for this particular wreath. If you use leaves you cut off of your trees, there is the possibility of wilting or even molding depending on moisture, and once the leaves are dry, they can crunch very easily. It is best to use preserved leaf branches if possible.
Preserving Fall Leaves DIY
There are many ways to preserve fall leaves. but the thing you will have to keep in mind for this wreath in particular, is that it is necessary for you to keep them attached to their branches. There are several tutorials online, but it seems like this list is the most comprehensive. You will need to do a fairly large quantity, so keep that in mind when choosing which method works best for you.
Purchasing Preserved Leaves
I bought my preserved leaf branches at a local store both last year and this year. Sometimes grocery stores, Whole Foods, Trader Joes, and even Michaels will carry them and it doesn't hurt to make a few calls. I ended up using roughly 30-40 branches for my wreath, but it will completely depend on how full and thick your branches are. Here are a few sources I found for branches online:

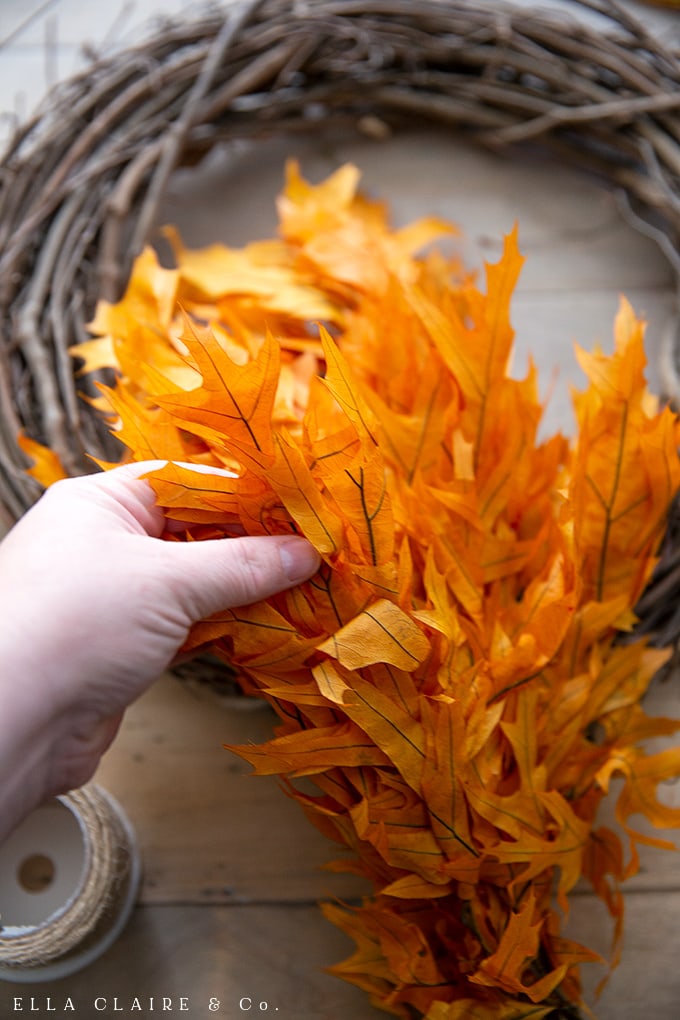
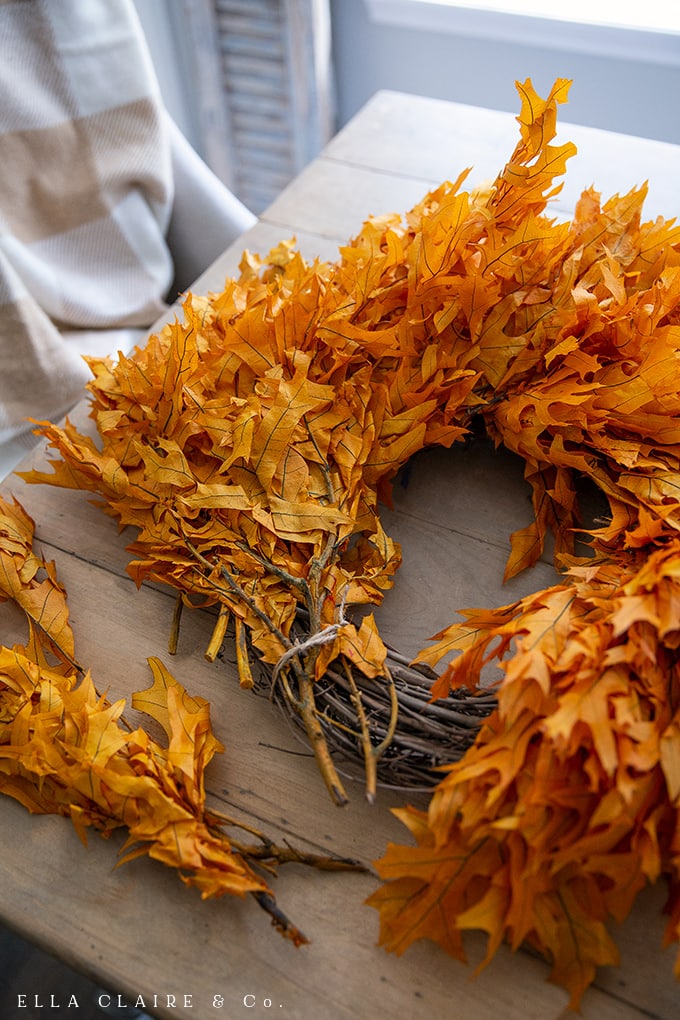
Step One: Fluff Your Leaves
Preserved leaves usually come quite flat and stuck together. In order to make the prettiest wreath, gently fluff each leaf and branch. You will want to be careful not to pull the leaves from the branches themselves.
Step Two: Tie Bundles
Tie branches together in bundles of 2-5 branches, depending on the thickness/amount of leaves on each of your branches. This will determine the fulness of the wreath. You want the base of each bundle to be nice and secure.
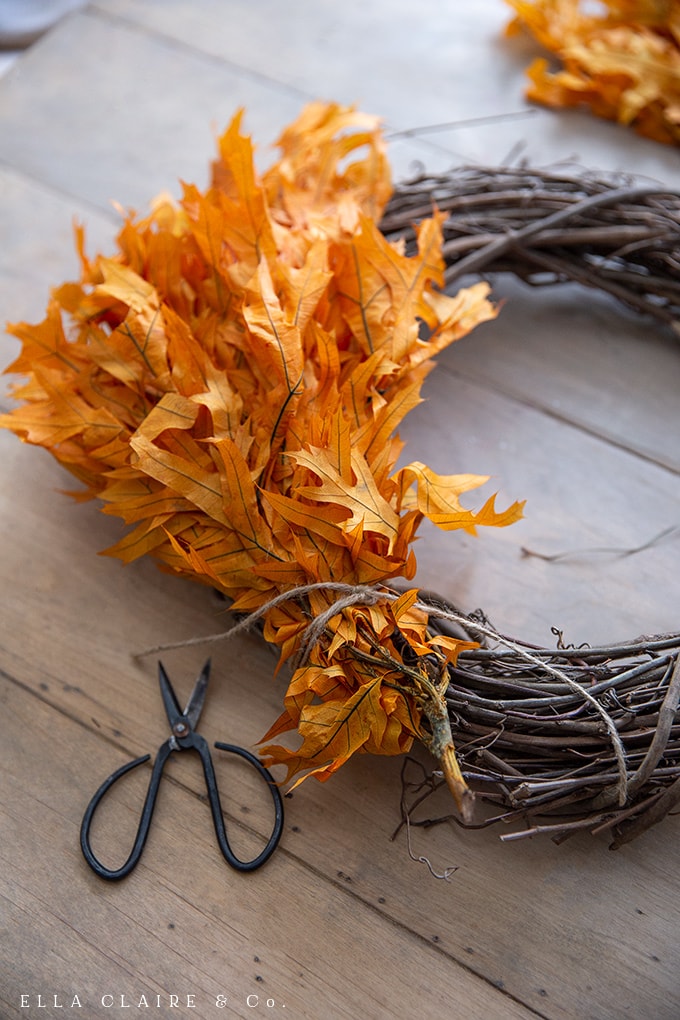
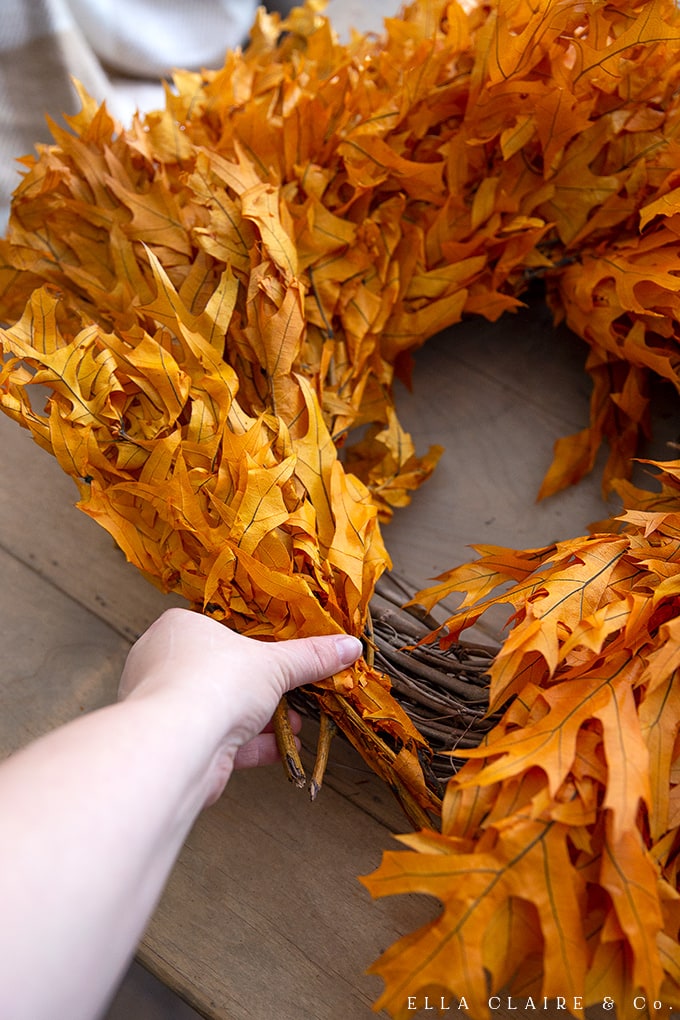
Step Three Tie Bundles to Wreath
Begin by tying the first bundle to the grapevine wreath. You will want to lay the bundle on top of the wreath, laying in the same direction of the flow of the wreath. I wrap the twine around the section of the grapevine wreath twice and tie with a knot, ensuring the twine is nice and secure and taut.
Step Four: Repeat
Leave a small 3-4 inch gap (give or take) and repeat. The next bundle should overlap the previous one, creating a nice and full wreath. Continue this around the entire perimeter of the grapevine wreath.

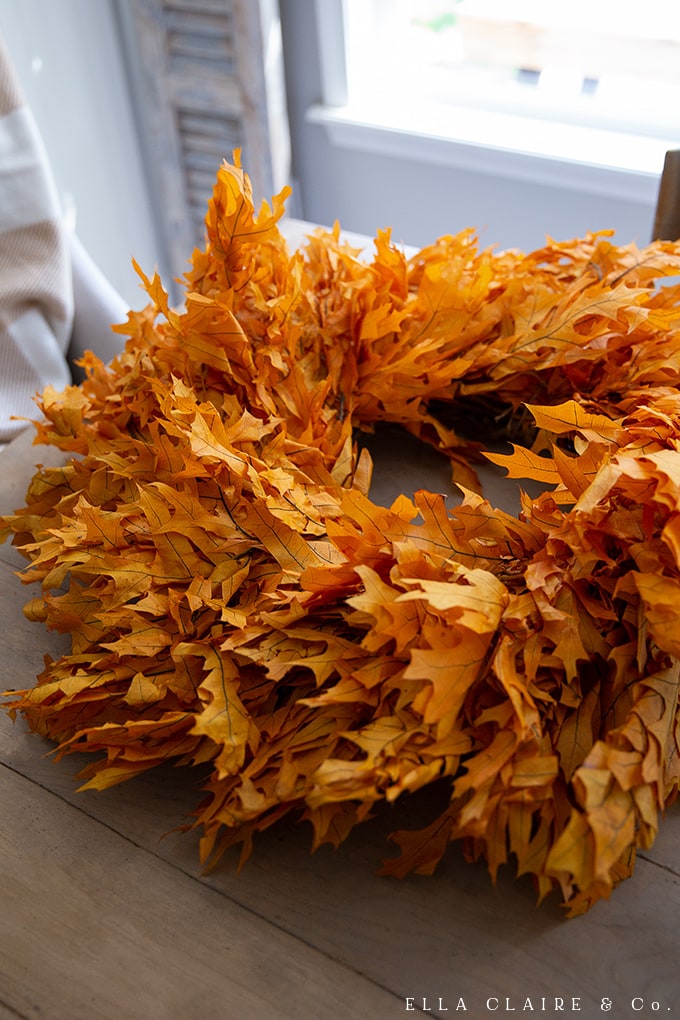
Step Five: Finishing the Wreath
When you come to the end of the wreath, tuck your last bundle up under the first one, ensuring that it still overlaps the last one that you tied on. You will have to finagle a little bit of the first bundle to make sure it is nice and secure and where it needs to be. If you need to add additional twine to secure it in place, don't hesitate to do so.
Step Five: Fluff and Details
When the wreath is complete, it should be nice and fluffy and full. I usually fluff my wreath one more time at this point and conservatively trim back anything that looks like it is sticking out of place. Tucking in those awkward or loose pieces is an even better option if you are able to do that.
Freda Carroll
Really Beautiful, just beautiful!!!
Lyn
Is 1lb of leaves enough to make this wreath? How much did you use?
Kristen Whitby
It would depend on the type of leaves you are purchasing.