

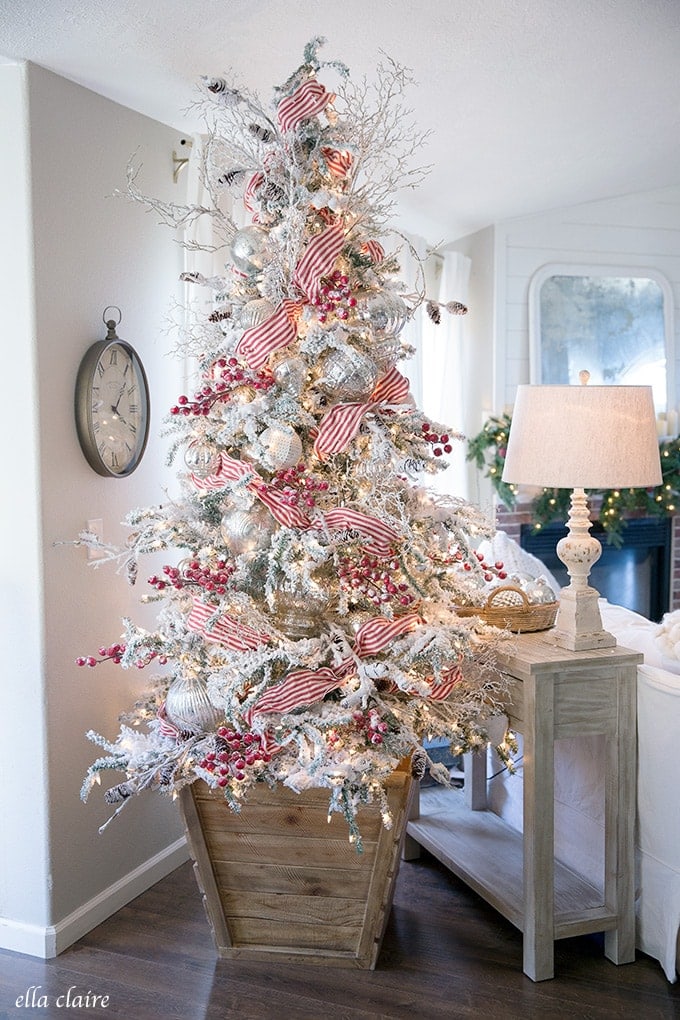
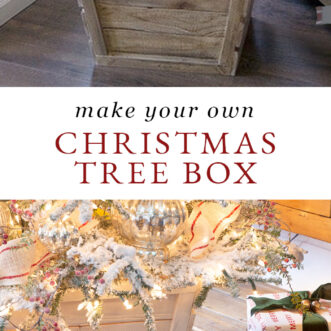
A vintage inspired tapered planked wooden Christmas Tree box, adding rustic charm and function to our family room.
Our sweet 10 month old baby has been busy zooming around the house in her little walker and thinks that the Christmas tree is very her own large, twinkly toy. She is the first of my 4 children to do this- I've never had an issue with any of the other kids- so I had to come up with a solution! I still wanted to have a Christmas tree (or 4). I decided to make a large Christmas tree box to keep it up off of the ground and away from her adorable (but destructive) chubby little hands! The funny thing is, now that we have a Christmas tree box, I am not sure I will ever go back! I love having it up off of the ground so much- and I love not having a tree skirt! It stays so much cleaner and nicer. You can see the rest of the sources HERE including my favorite ever flocked Christmas tree (which is on sale) and if you have a Christmas tree you would like to flock, I also have a tutorial for that HERE.
I am still going to change the ribbon and a few things out this year, but this is what I have so far.
I've seen a few different types of Christmas tree boxes before, but not this particular style. I really wanted mine to have tapered sides- bigger on top and smaller on the bottom- instead of the straight ones I had typically seen. So, I set to work and built one in the garage one night while my littles were sleeping! There was just one problem.... I had concocted it in my head and was determined to build it, but didn't make an actual pattern for it that would be easy to share with all of you. When I posted it on Instagram a couple weeks ago, so many of you wanted to make one! So, despite the fact that I just kind of built it and measured as I went, I made a little instruction sheet for it after the fact and I hope it helps. I measured all of the pieces and angles of my box and included them on the sheet.
I want to give you fair warning, this is not a professional woodworking pattern by any means. I am just sharing how I personally built my Christmas tree box. I am not a professional carpenter, I just like to try to bring my ideas to fruition. All measurements are rough because I really just built it as I went. I highly recommend using an angle tool to get the exact angles that you need when you measure to make your cuts.
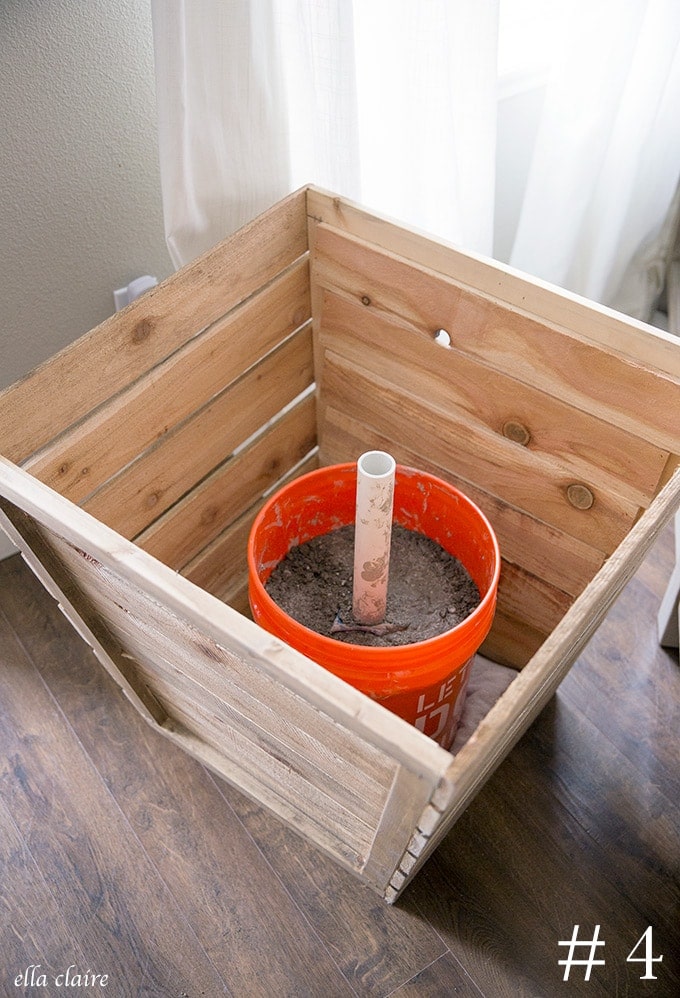
One more quick note- this box does not have a bottom to it! I built a stand for it that sits on the floor inside of the box so it could hold my tree higher off of the ground than the stand it originally came with. (see pic #4 below and see tutorial for it HERE) I put it on top of a towel first. I always do this so it is easier to move and adjust the tree.
DIY Christmas Tree Box Instructions
- First, download and print the instruction sheet below (it has all of the measurements).
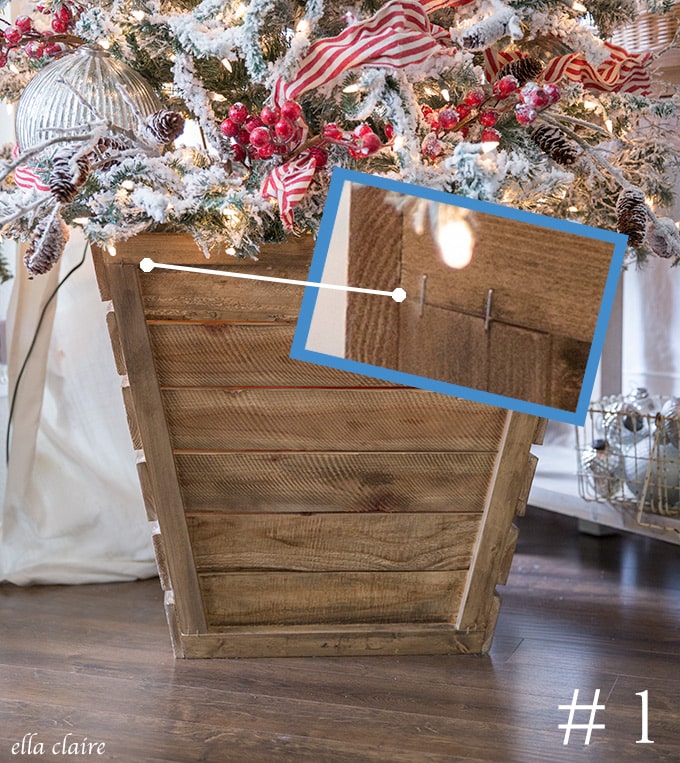
- Build your trapezoid frame for sides 1 & 3. This is the most important step. If you can get these frames fairly perfect the rest will come together easily. Note- the best "right" way to attach the angled pieces of this trapezoid frame is to drill pocket holes and screw them together. With that said, I cheated because I was scared of spiders and didn't want to look for my missing Kreg Jig at midnight in the garage. I glued and stapled (with a staple gun) both the front and back sides of my frames together (see pic #1 below). Once the box was completely assembled, it was all very sturdy so it didn't end up mattering that I cheated. And I kind of like the industrial look of the staples.
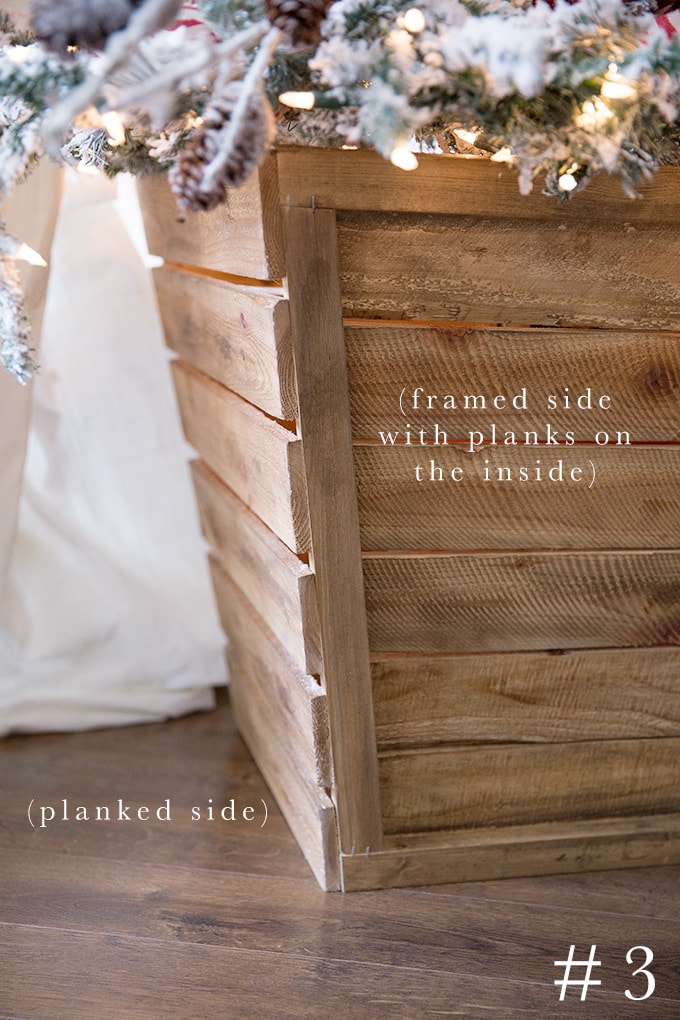
- Add slats to the backside of your frame. There is no need to cut angles as the slats will be on the inside of the box and won't be visible. (see pic #2 of the inside of the box , below, to see what I mean)
- Cut out the angled slats for sides 2 & 4.
- Attach the top and bottom slats on both sides 2 & 4 (nailing them to the outside of 1 & 3), creating a box. Then begin to attach all of the slats, evenly spaced out, in between. I used a scrap piece of the same fence picket wood as a spacer for my slats. (see pic #3 below)
- Sand rough spots to remove splinters.
- Stain or paint. I used my favorite stain formula HERE, adding an extra splash of jacobean. My goal in staining my box was not to saturate it, but moreso just to give it a little weathered color. I used a rag that I dipped in the stain and then squeezed out (I use gloves when I stain). Then I rubbed it quickly over the wood to barely transfer the color without fully saturating it- almost like dry brushing, but with a rag and stain.

I am in love with it! I don't know if I will ever go back. I always hate how Christmas tree skirts get kicked around, and this solves that problem. Also, I am noticing that the tree sheds so much less flocking than normal, and that the flocking that does shed is so much easier to clean up than with the tree skirt. You can just sweep it up (or vacuum if you have carpet)!
Here is the (very non-professional) printable instruction sheet with measurements. Just click on it to download.

So, tell me. Are you going to build a Christmas tree box? I think you will love having one too!
Kristen
I had my friend build a Christmas tree box and it came out beautiful but it is way too big for my tree and house. 😢. I need to have a smaller one made.
Once the smaller one is made I’ll post a picture.
Kristen Whitby
Oh darn! If you end up building a smaller one and wouldn't mind sharing the measurements, I would love to update the post for others who need a smaller one too!
Justine
This is brilliant, thank you so, so much for sharing this with us!!
Tamiloecker
Thank you for inspiring me to make my own Christmas tree box. Your tree is so pretty!
Crystal
Thank you, THANK YOU!
It’s just what I need.
Love it!!!