

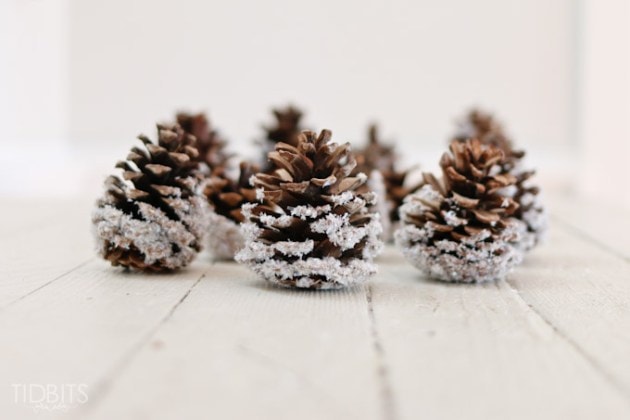
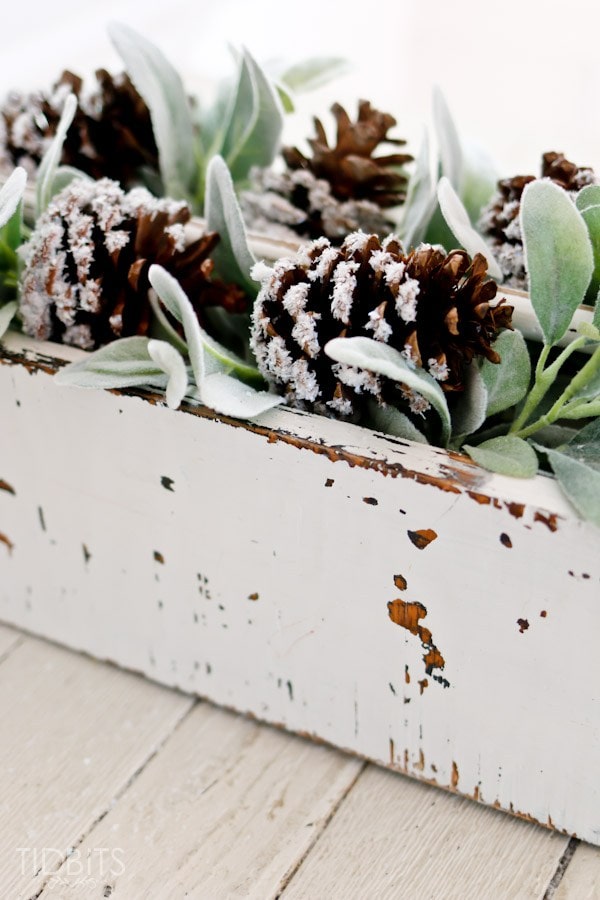
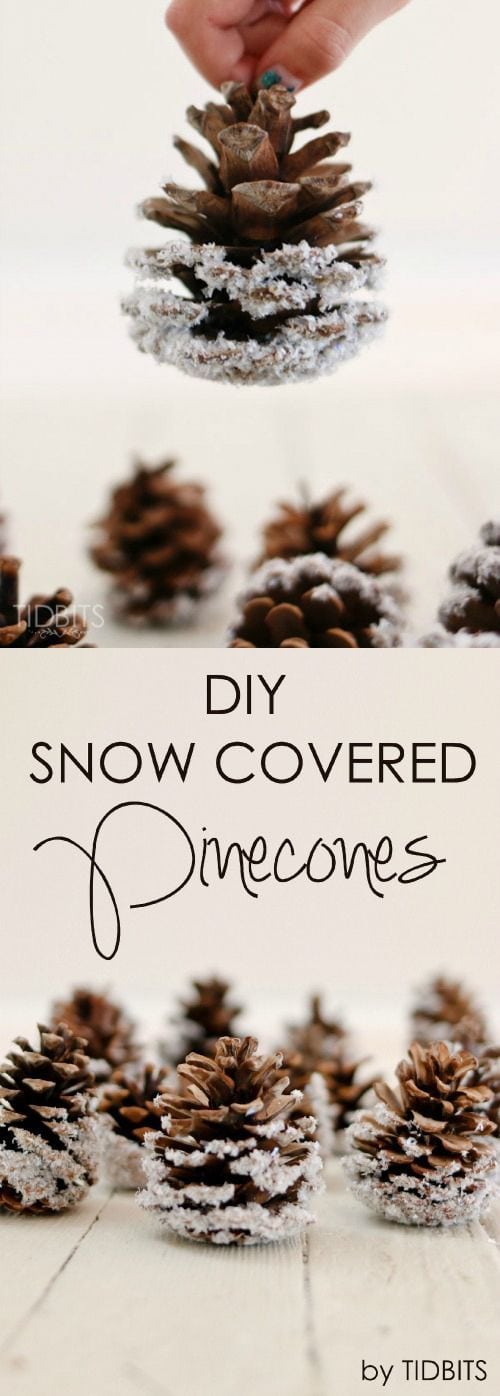
DIY Snow covered pinecones- an easy and beautiful way to add that flocked look to pinecones for wreaths and ornaments and for other Christmas and Winter decor like filling a bowl, and adding to a mantel or tablescape.
So glad to be here again! This is Cami from TIDBITS, here to share a seasonal decor project that could ring in the holidays and last well into the winter.
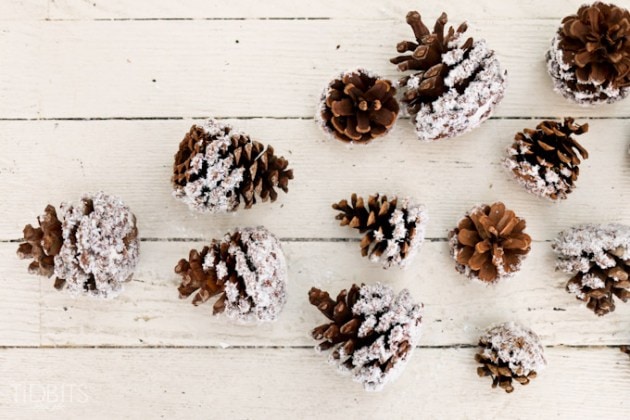
These DIY snow covered pinecones are simple enough for the whole family to help make.
They can be used in a variety of ways.
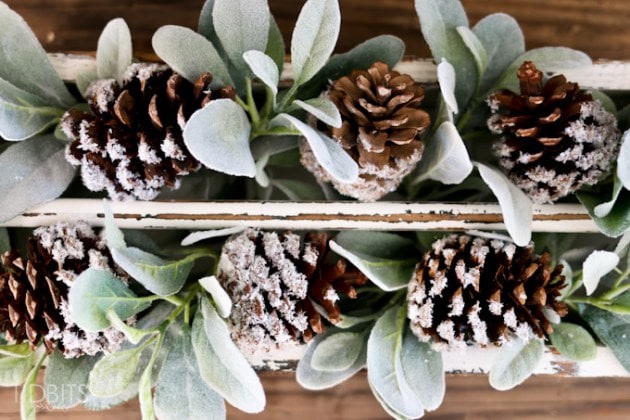
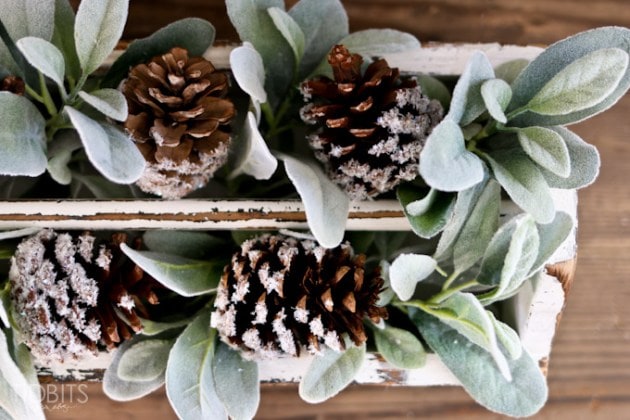
Here I've tucked them in a vintage style tool box with some faux foliage.

I've also added them to our Christmas tree this year and several other places where a little something more was needed.
I would love to have you over to see our Christmas decorations unfold. We like to do things as inexpensive as we can, and free if possible. So far we've completed our mantel/fireplace area in our living room (details HERE).
And if you are looking to make a countdown this year, you might like the tutorial I have for these Christmas countdown grain sack bags hanging on a ladder my husband made from tree limbs.
But while you are here, let me show you how easy and affordable it is to make these DIY snow covered pinecones.
If you have a little one handy - this is the perfect mom and kid friendly kind of project. She was a perfect little demonstrator for me as well 😉
Supplies:
- Pinecones
- As many as you need. I found a large bag for $1 at my thrift store, but this time of year you can usually find them around trees for free.
- Glue
- Fake snow
- I grabbed a small bag at Hobby Lobby for cheap, and it gave me plenty to work with. (also buy here)
- 2 paper plates

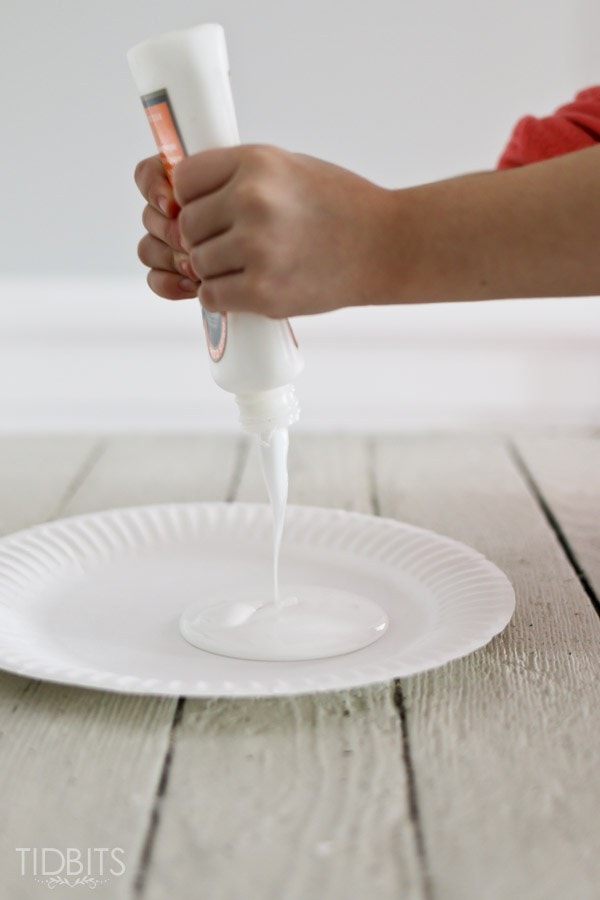
First, pour a generous amount of glue onto one paper plate.
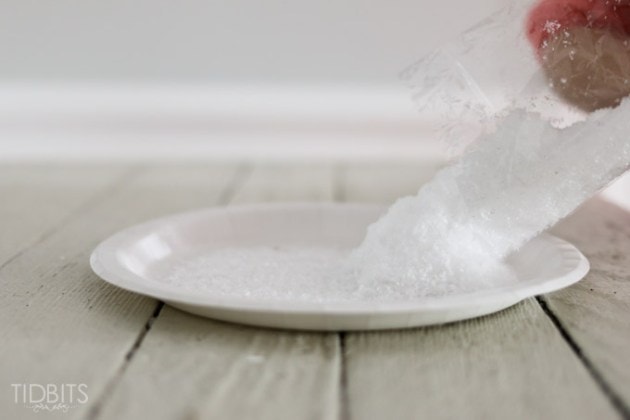
Then pour the snow on the other paper plate.
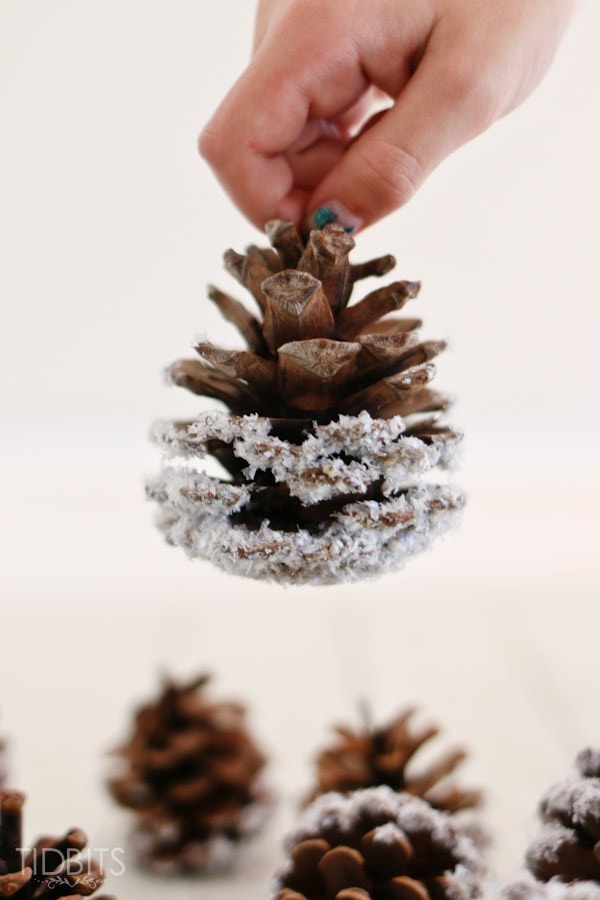
First dip the pinecone in the glue where you would like the snow to stick.
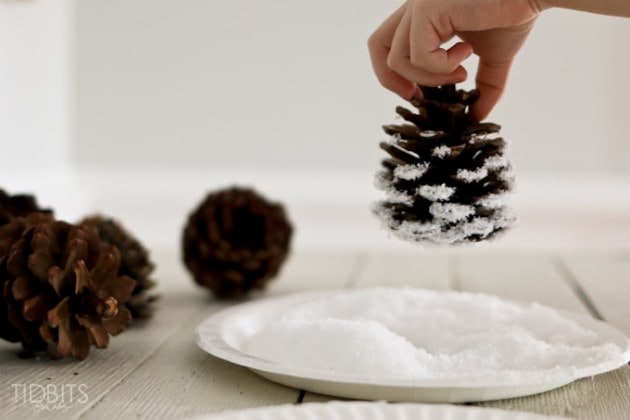
Then roll the glued pinecone around in the snow. Place the pinecones on a protected surface to dry.
And it really is as easy as that. Once they are dry, you can shake or tap them to let the excess snow fall off, and then use them around your home as needed.
Before you go, if you love projects that you can do for yourself, while letting the kids help - here was another great one for me and my little sweetie.
These hanging clay stars look beautiful and were enjoyable to make with my daughter. That's a double win! Find the tutorial, HERE.
A few more popular Christmas Tutorials for you to check out:
- How to Flock a Christmas Tree
- How to decorate a Christmas Tree
- How to Put Ribbon on a Christmas Tree
- Video Tutorials: How to set up and decorate Christmas Trees
- DIY Gingerbread Village Jars

JUDY SCHOLL
I LOVE SNOW ON PINE CONES , THANKS FOR SHOWING ME HOW IT'S DONE .
Zella
Thank you for the great ideas. I love pine cones any time of year!
Haylee
These are so cute and would be so much fun to make with my little guys! I'm looking forward to trying them out! 🙂
Alisha
Hey! Any idea how long these would be to dry? I want our ladies group to make them, but I am wondering if they will be done in time to safely take home at the end of the meeting... Thanks!
kelli
how many ornaments do you get out of 4oz artificial snow/ a guess is totally fine
Marilyn
Hi Cami, Do you know the kind of snow you got, and how much it cost? Thanks for your help.
Shawnna
love the ideas!! So creative!
Jill Kowalewski
Hi,
Love the look of the "snow" covered pinecones, did you know that in a pinch you can use Epsom salts for the snow?
I think it might even be cheaper and can be found in most dollar stores. Your ideas are beautiful and quite elegant. Lovely home without a lot of fussy stuff!
Jillie