

I am so excited to share this post with you today, sponsored by GraphicStock.com. I hope you take my tutorial and create something wonderful for your home or a free printable for your blog! Sometimes I use Photoshop and sometimes I use this method... It depends on what mood I am in! I hope you enjoy this tutorial that I put together for you!

Printables can sometimes seem a little intimidating to make, but I assure you, YOU CAN DO IT! And, you can do it without having to tackle learning to use Photoshop either. I will show you the easy way to make them, and I will also share a resource for beautiful graphics that make your printables really special!
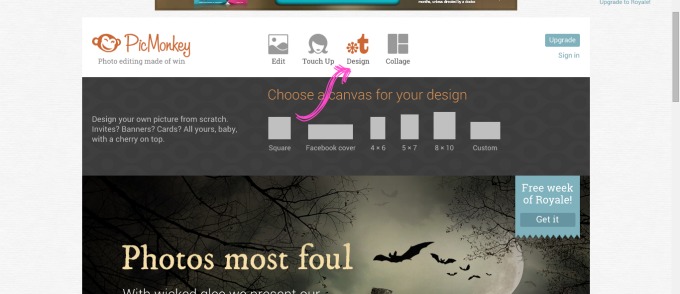
To begin your printable, head on over to PicMonkey.com, which is a free resource for editing pictures and creating fun things like printables Sometimes I also follow pretty similar steps and create printables in Microsoft PowerPoint.
To create a printable you will want to click the "Design" button.
This will take you into a screen with a blank page in the workspace. The first thing you will need to do is crop your page down to the size you would like your printable. Click on the top button in the left sidebar and use the drop down menus to make your selection. I chose to go with an 8x10.
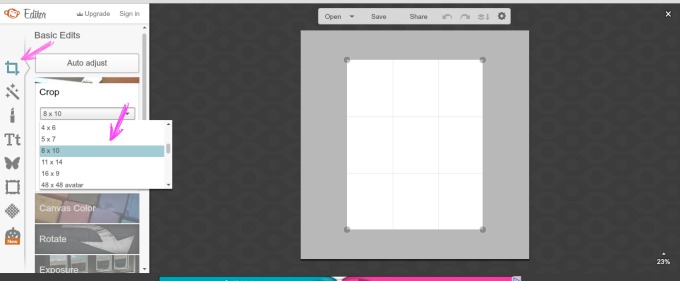
Note: if you are creating something for your blog or website, you can change the actual pixel size here as well.

Now that your page is the size you want, it is time for the fun part! Head on over to GraphicStock.com and sign up for your 7 day free trial. You will then be able to search and download graphics for your printable. With the free trial, you can download up to 20 images a day and even if you cancel, you won't be charged. If you want, you can roll over to a monthly plan. But the awesome part is that you can download up to 140 images and keep them forever, even if you cancel.... Um, heck yeah! I will also be giving away a 6 month subscription at the end of this post!
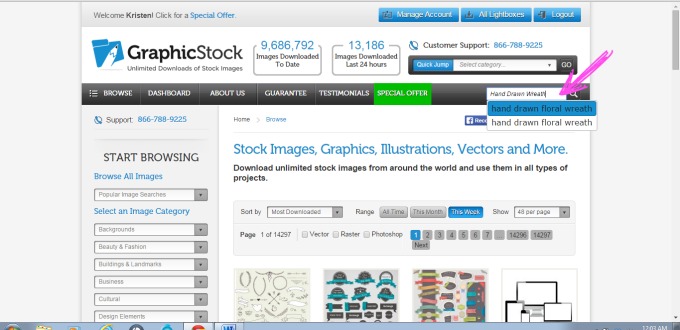
I wanted a cute wreath for mine, so I did a search and picked from the MANY options.
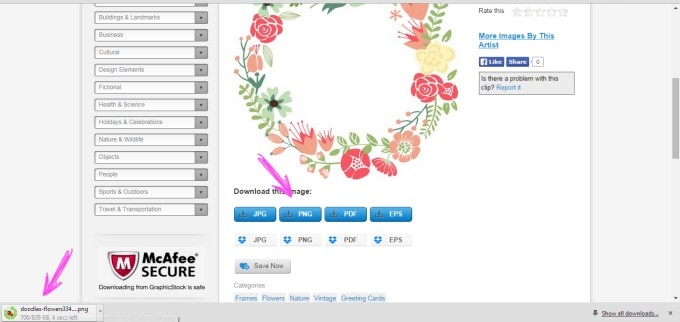
I loved this fun colorful wreath. Just download your image by clicking on one of the buttons underneath the image. I chose the PNG. You can see it downloading immediately at the bottom of my screen below.
To insert the graphic into your printable that you created in PicMonkey, first click on the little butterfly icon in the sidebar. This will bring up the options below. Click on "Your Own." Then just choose the wreath that you downloaded to your computer. It should be in your "downloads" file.
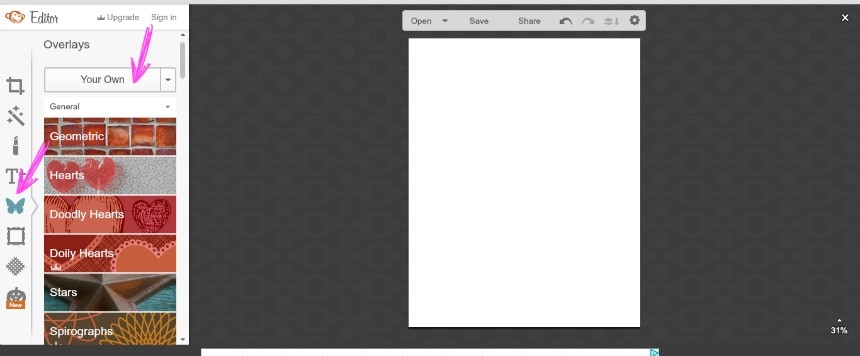
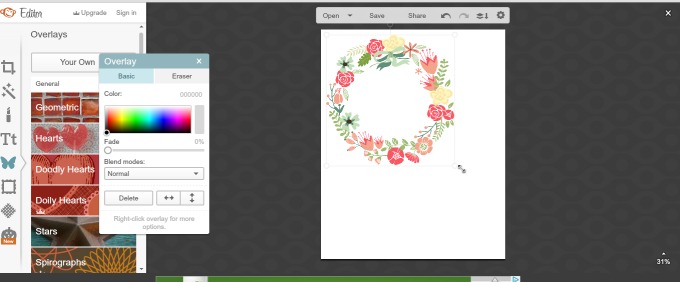
It will be pretty small when it first appears on your screen. Just drag the corners to make it the size you desire.
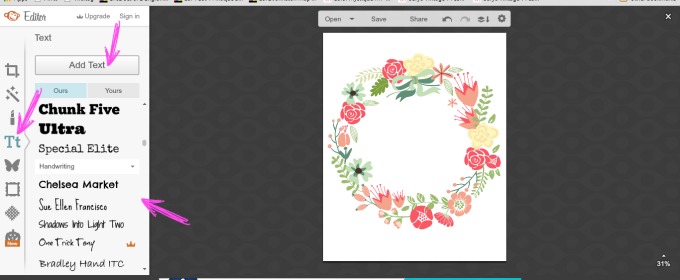
I think this graphic is so pretty all by itself, but I still wanted to add one of my favorite quotes to it. To do that, just click on the "Tt" icon in the sidebar which will open the options you see below. Click "Add Text" and choose which font you would like to use. They have a great feature where you can use your own fonts as well.
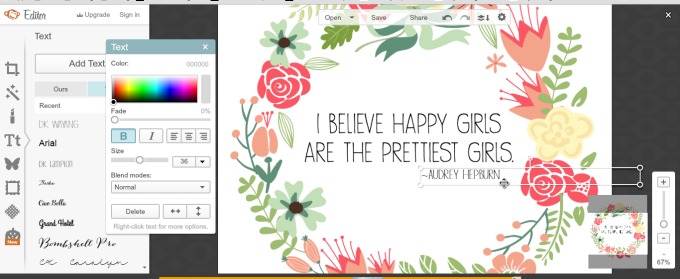
Type in the words you would like to use, and play around with the size, spacing, color, etc. When you are finished, save a copy to your computer by clicking on the save button at the top of the screen.
And that's it! Easy, right?

I love all of the graphic options on GraphicStock.com! I felt a little like a kid in a candy store. Confession: I stayed awake looking at all of them way too late for way too many days in a row. Oops.
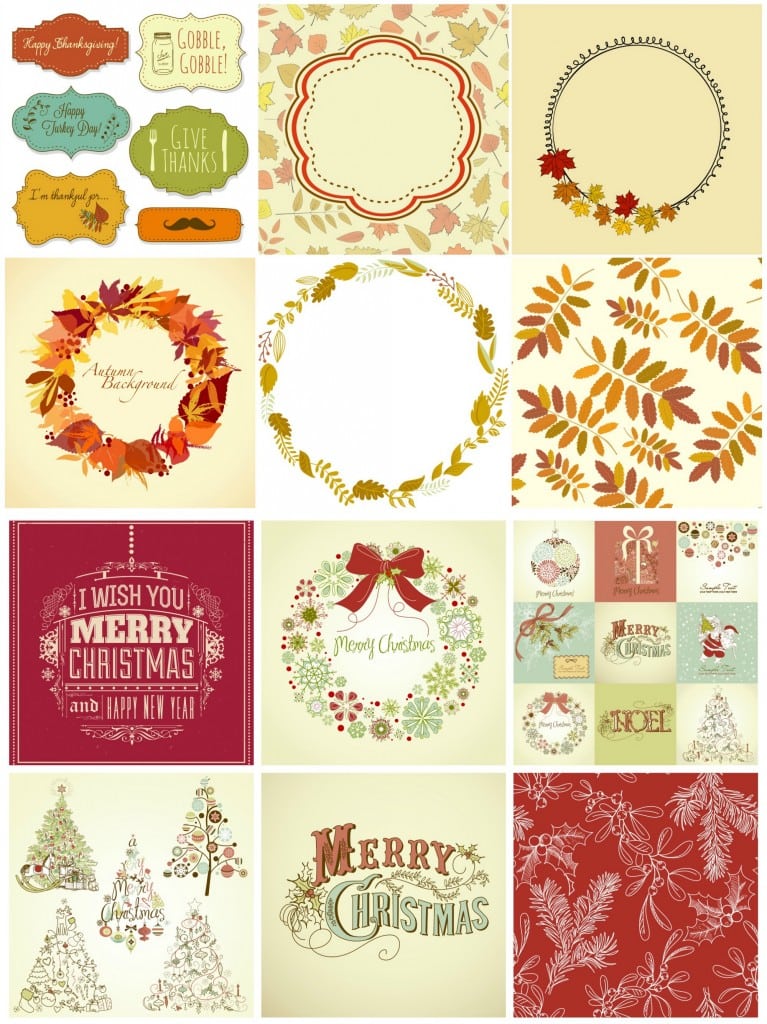
Here are just a handful of my favorites for the upcoming holidays!
Michele
SO helpful- thank you so much!!!
Kelly
I would make a printable with an inspirational quote.
Reggie
I'd make a printable to frame for Christmas. Thanks for the tutorial. Definitely going to try!
Susan
So cool! Can't wait to try it!