


I came up with a new technique for making buntings/banners that I am excited to share today!
But first, I am too excited to hold it in... the big announcement.... I NOW HAVE AN ETSY SHOP!! This Halloween bunting is my very first listing! You can check it out {here}. We will also have other seasonal decor that we will adding in the next couple of weeks. I am planning on listing my Autumn signs {see here} on either Monday or Tuesday!!
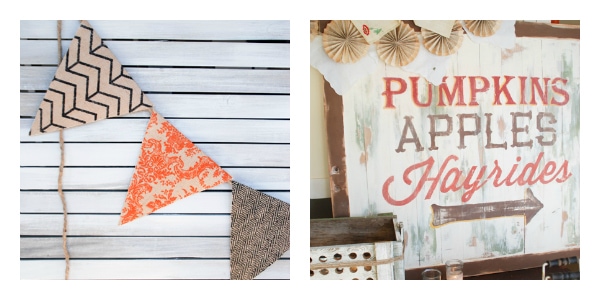
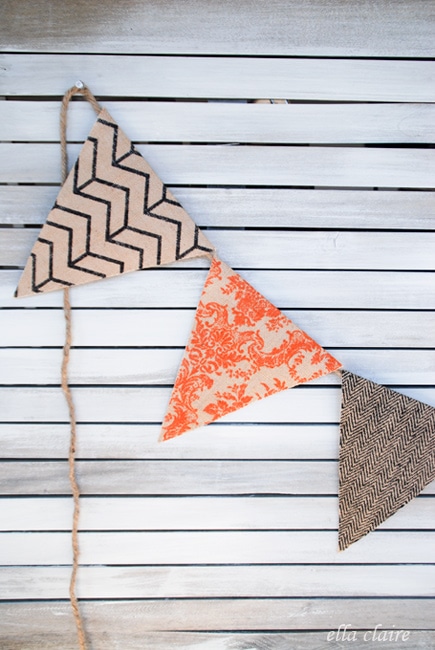
Ok, so I know there are a million banner/bunting tutorials out there, but this technique is BY FAR my favorite. It is interchangeable! You will see in the pictures toward the end what I am talking about, but trust me, it is way easier, hangs better, lasts longer, is easy to store, and looks really high quality.
See... it has this little flap that is STURDY so it hangs nicely on your thick Jute rope. You can space it however you want, play with the order of your patterns, subtract pennants if you need to make it shorter, or space them further apart if you want to fill a larger area. It is way easier that the ones that are glued down.

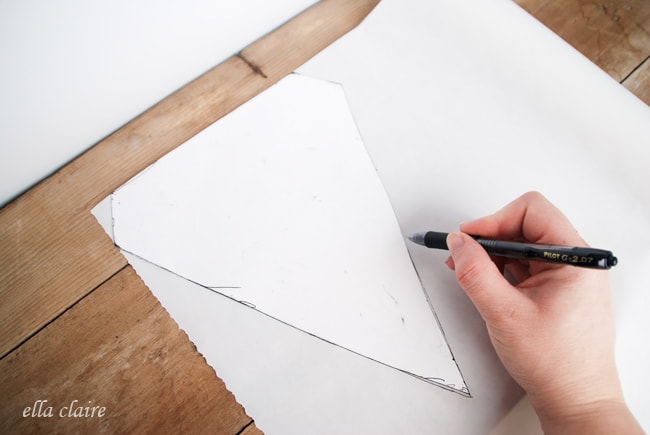
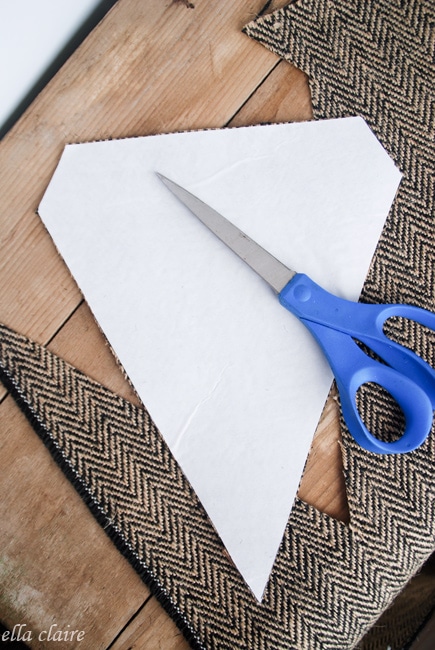
To make yours, first trace your pattern onto the paper side of a sheet of the heavy duty Heat n' Bond. I just drew my pattern, but there are a lot available free online if you search for one.
Cut out the pennant from the Heat n' Bond and iron it onto your burlap. (this burlap is two-sided or you would normally just iron it onto the back side of your burlap)
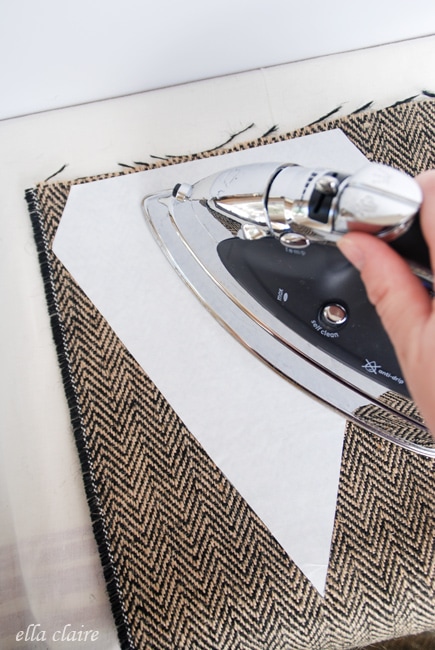
Cut your burlap carefully around the Heat n' Bond outline.
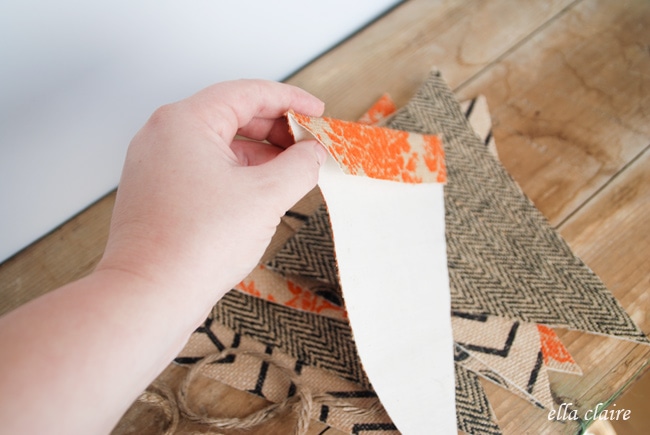
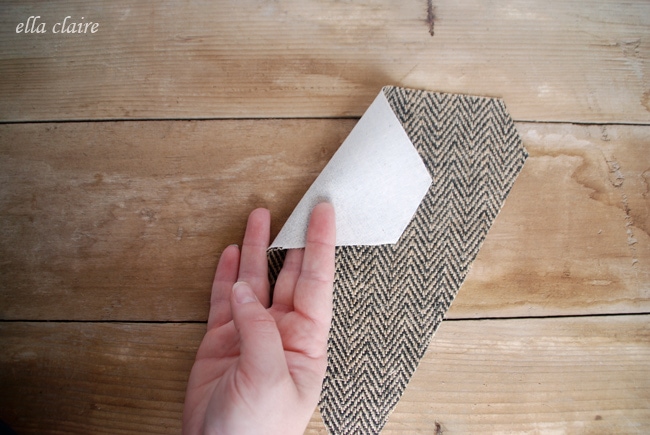
Peel off the paper backing.
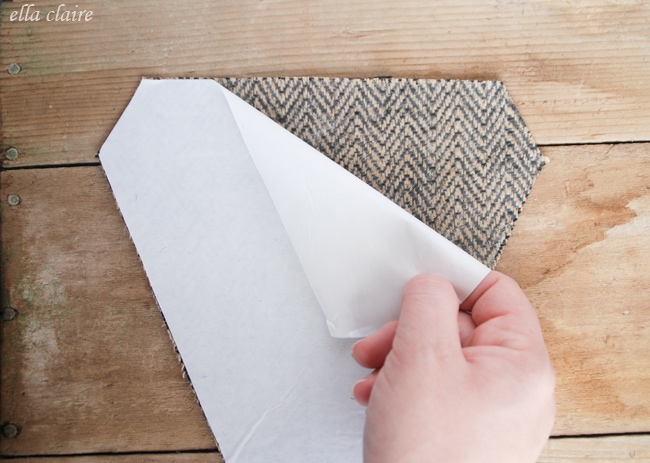
It is hard to see here, but you are going to iron muslin onto the Heat n' Bond side of your burlap. You want to make sure you are ironing on the muslin side to create the best bond.
Then, carefully cut your muslin around the burlap outline.
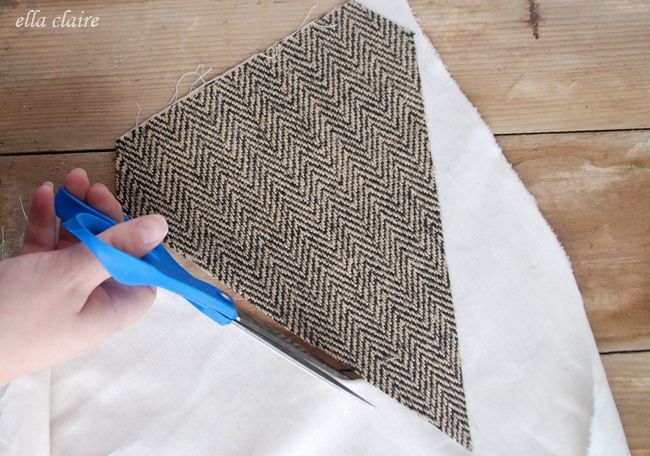
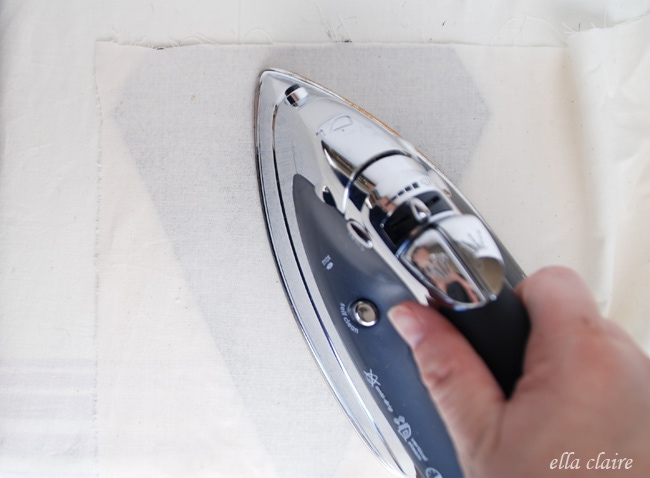
You are left with a THICK and almost tailored feeling, very nice quality pennant.
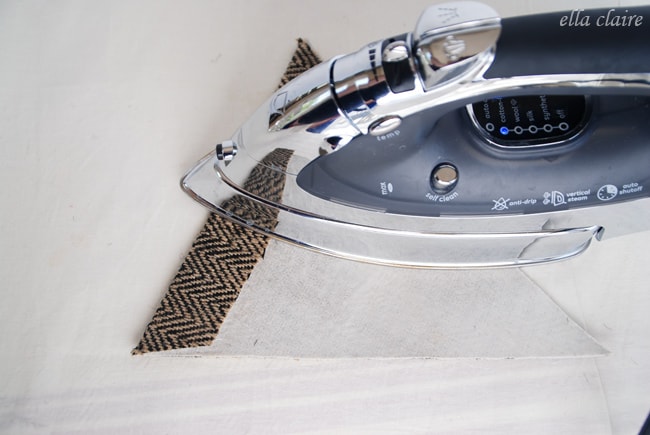
Thoroughly iron down your top to create the flap. I use steam while evenly ironing back and forth, but you will need to do whatever works best with your iron since every iron is different.
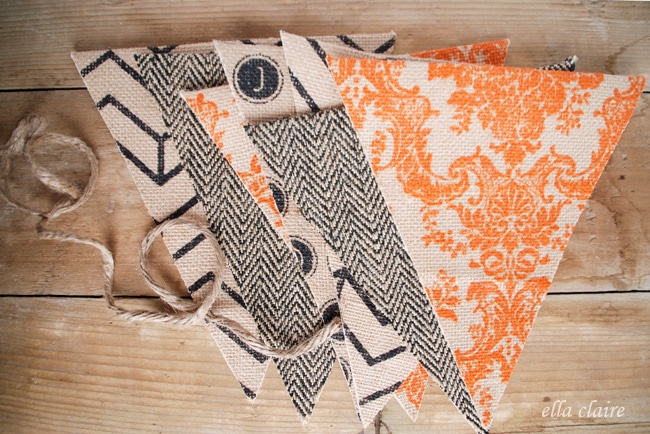
Repeat with each of your patterns to create your banner. I got all of my printed burlap for this project from JoAnn Fabrics (I did not paint it; it is printed). It is spendy though... ranging between $9.99/yd. to 12.99/yd. But, it is SO pretty!
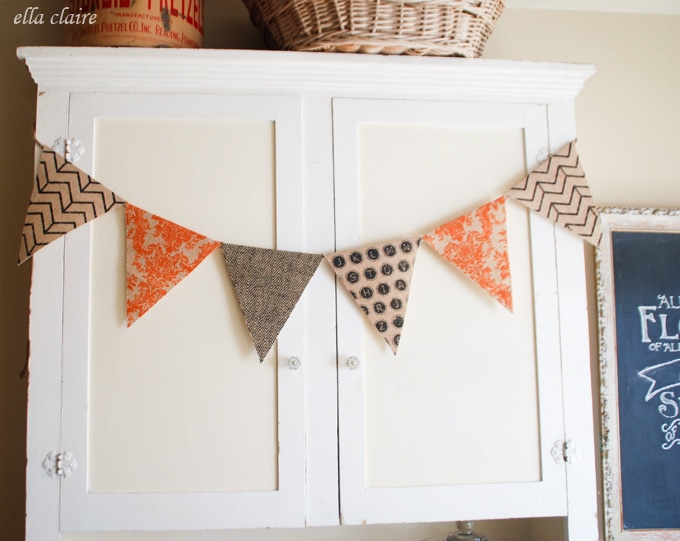
I cut a length of 10 feet of this beautiful thick jute rope, and arranged my pennants. Simply hang them from the flap onto the rope and they hang BEAUTIFULLY!
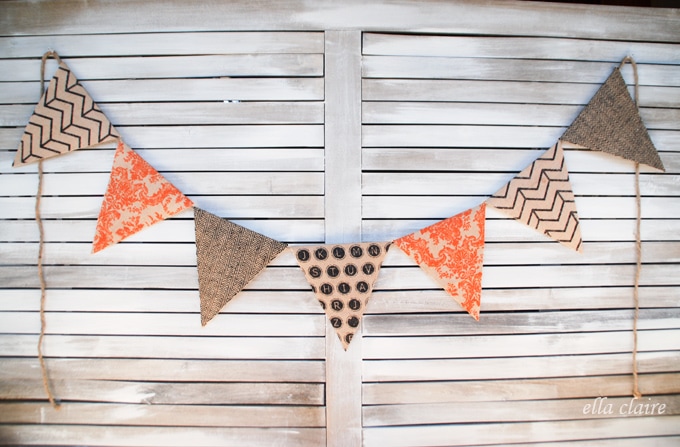
I removed one of the flags and hung it on my kitchen cabinet, but I think I liked it better with all of the flags on my mantel. I will probably be moving it back there when I decorate my Halloween mantel.
I just love how this bunting looks. Halloween is so fun.
If you are interested in purchasing one of mine, you can find it HERE.
Thanks for reading!
janice
You could probably add a bit of velcro on the underside of the flap which would temporarily secure it too.
doris hansen
Yardage in canada is 22.00/metre. love the look...
going to give it a go today.
Measurements for flags ?
Lisa Pettry
This is a terrific idea! Thanks for sharing.
[email protected]
LOVE this! I am going to have to give this one a try! Pinning 🙂 Life to the full! Melissa @ DaisyMaeBelle
Debra Oliver
these are adorable, I'll be checking your Etsy Shop for more banners!!
Ann McFarland
The only thing more delightful than your tutorials is your generous spirit of sharing. Thank you for the excellent photos and clear directions. A question I have is can you hang this outside on a breezy day. Will the pendants slip off the little flap, or are they secured in some other way. Thanks you so much for your kind, generous heart.
Lolly Jane
Darn cute, Kristen! Love it!! Congrats on your shop!!
xoxox
Little Vintage Cottage
Hey, that is a great idea Kristen! It looks beautiful and I love the fact that it's interchangeable! And I see that you've already sold two in your new Etsy shop, congratulations! :o) I hearted you from my Etsy shop, Little Vintage Cottage (https://littlevintagecottage.etsy.com).
Tania
Two Vintage Sisters - Robin and Pam
Love how this looks! Great combination of prints and colors. Thanks for sharing! Robin
Keeping It Cozy
Soooo cute! I love your fabric choices and thank you for the tutorial!
Megan
how fun! absolutely adorable.
Lisa @ Fern Creek Cottage
Love your Fall bunting and what a great technique!! I definitely want to try this!
Di
Thank you for sharing your techniques with us, this is such a great tutorial. Love this banner! Di@Cottage-Wishes
Shannon
Congrats on the etsy shop!!!!!!!!
xo,
Shannon