

Lisa, from , Celebrate Creativity, is back with a fun project today! She is so creative and I love having her here!
~~~~
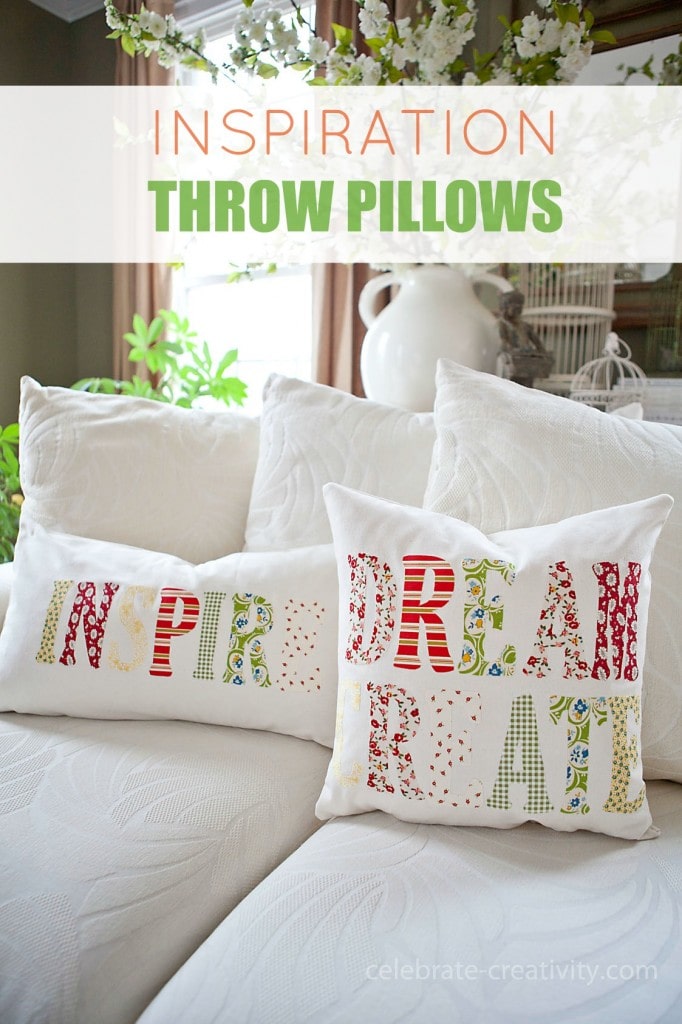
Greetings blogging friends, Lisa Tutman-Oglesby here. Spring can't come soon enough, right? Until it gets here (just a few weeks), I thought these cheerful, inspiration throw pillows will help pull everyone out of those cold winter doldrums.
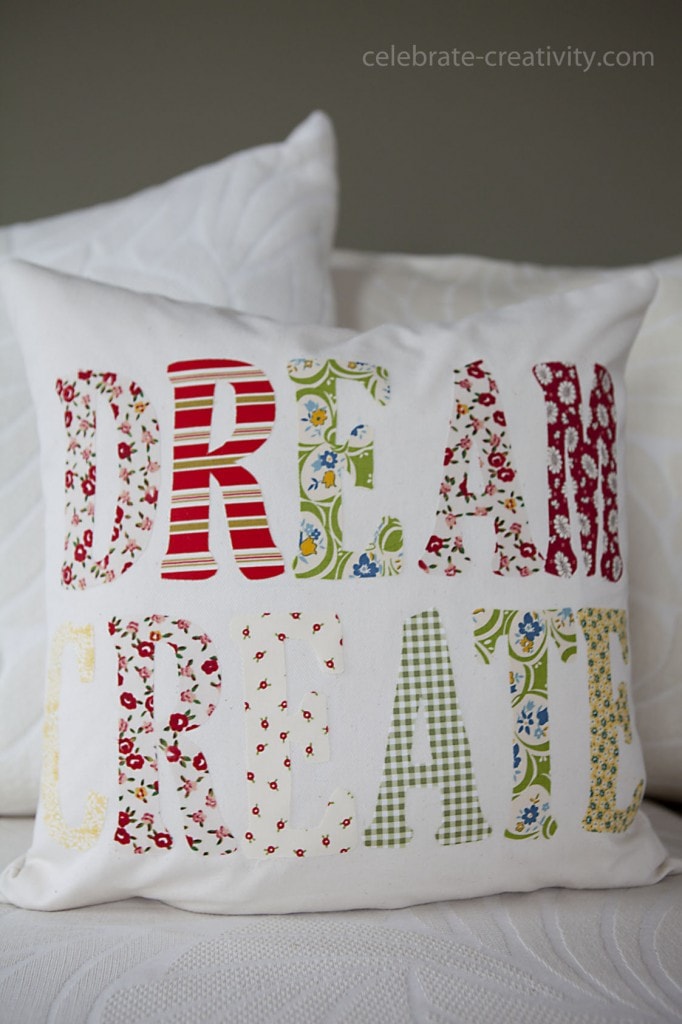
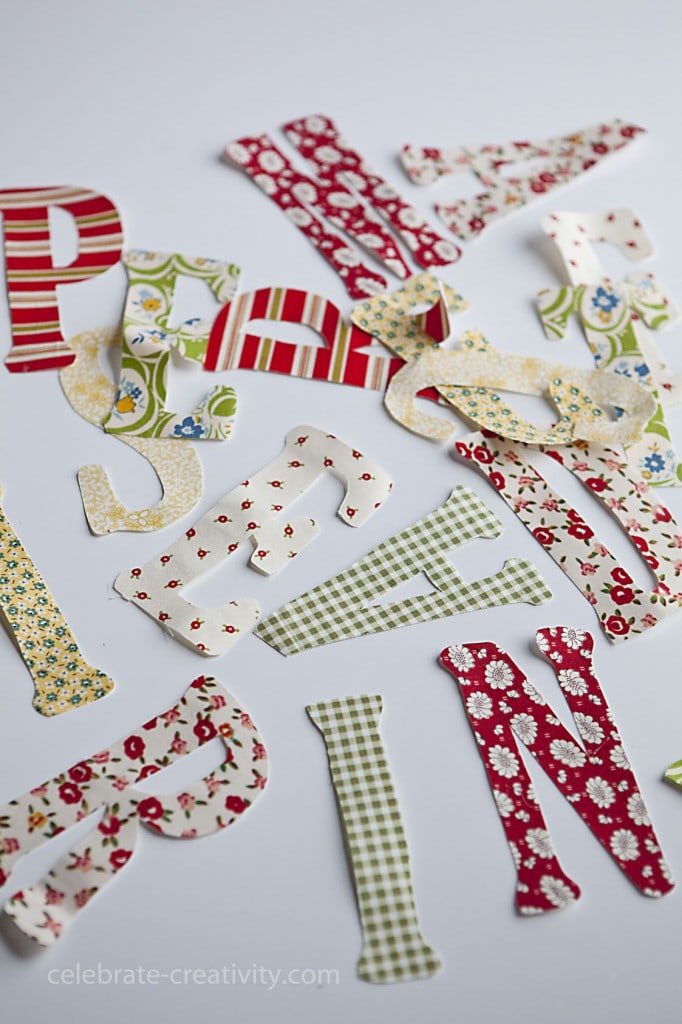
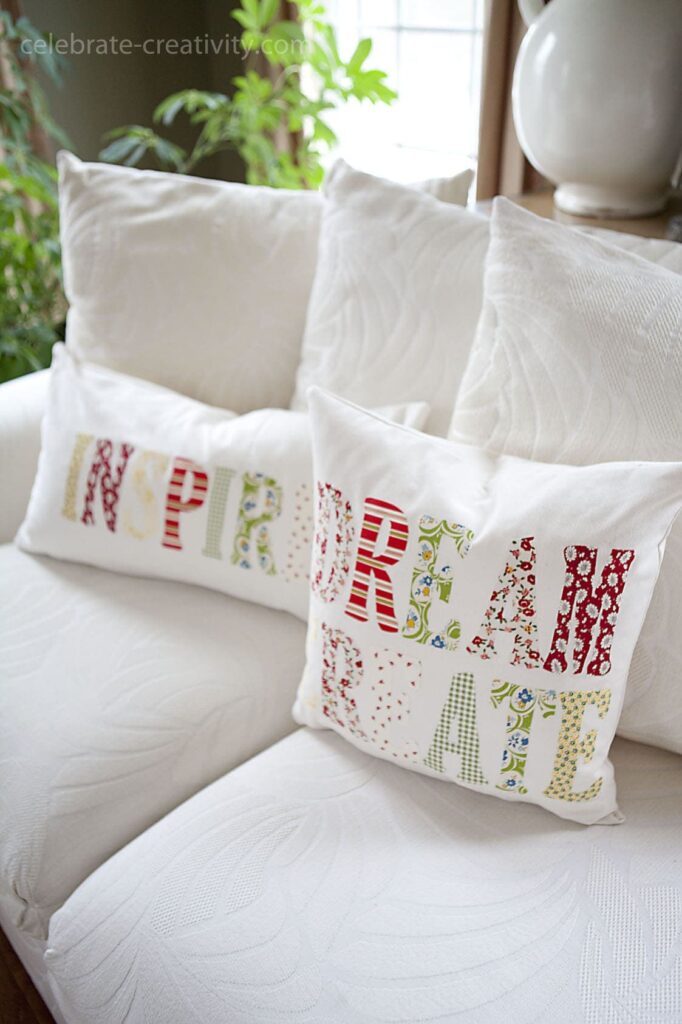
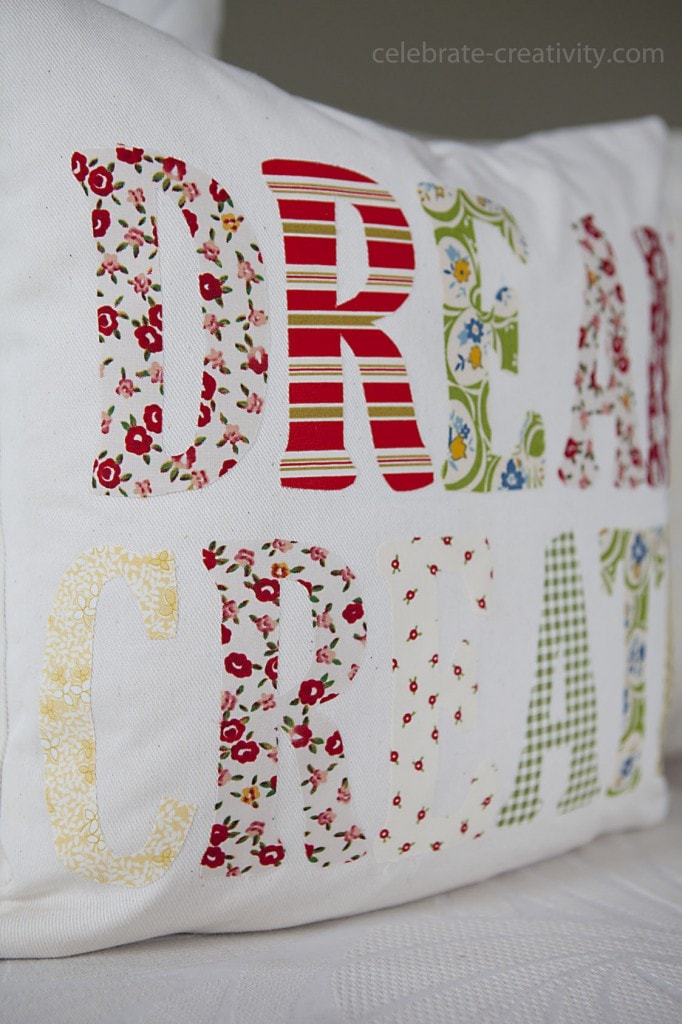
DREAM. CREATE. INSPIRE. Those are three words that often come to mind as I pursue my various creative interests.
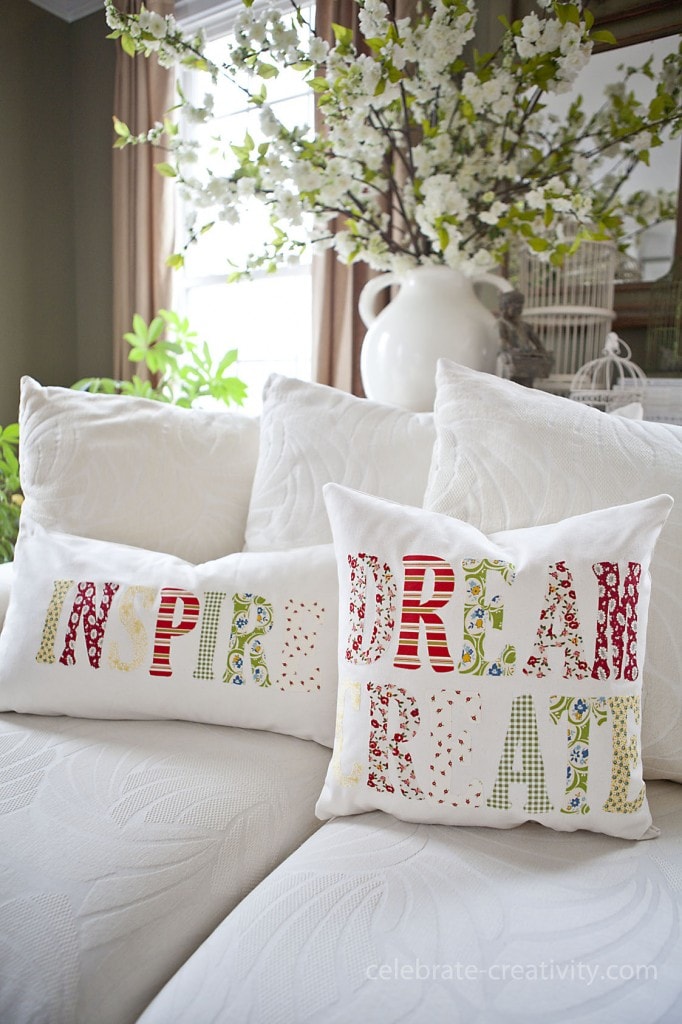
If there are any words that inspire you, these easy-to-make, appliqued throw pillows are a great way to keep that inspiration front and center and at the same time incorporate a little whimsy into your home decor.
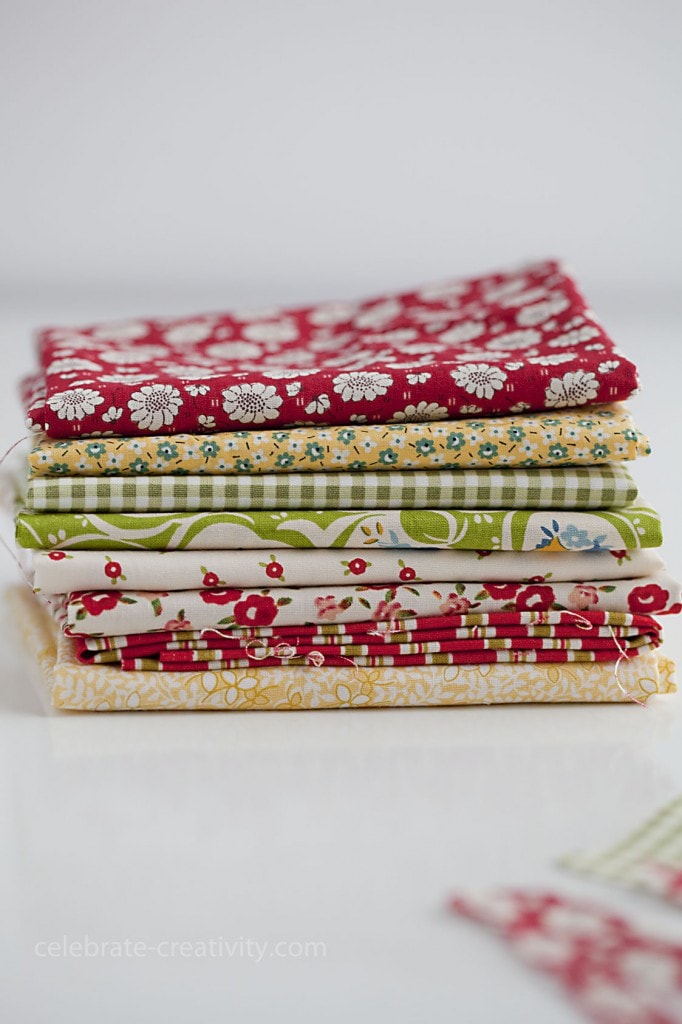
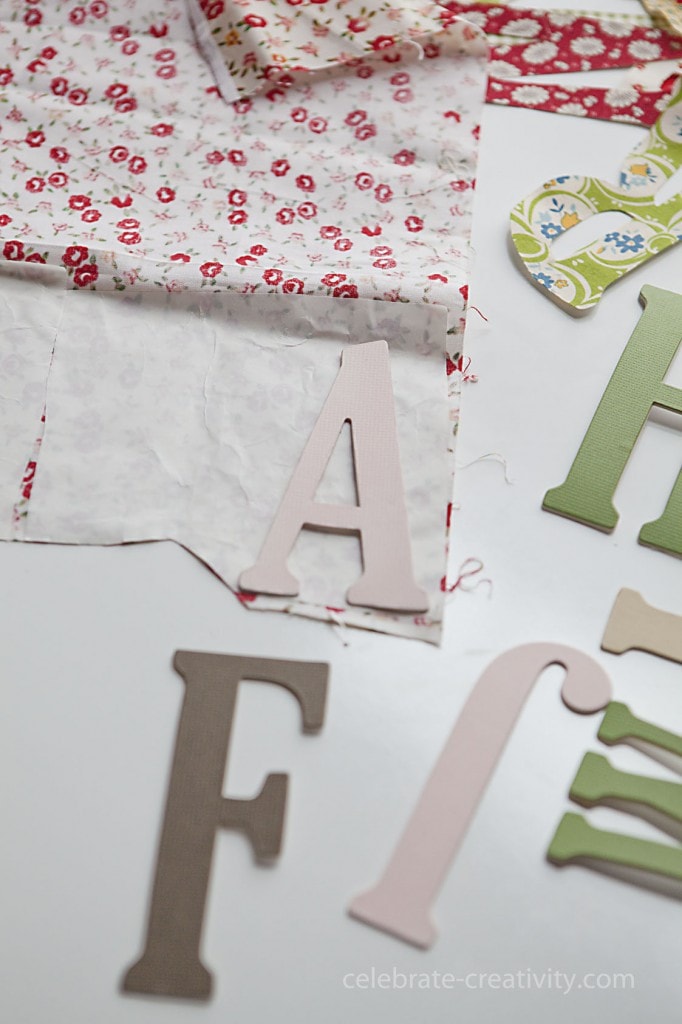
You won't need much fabric for this project either.
In fact, if you're a quilter (like me) you may already have a stack of "fat quarters" on hand.
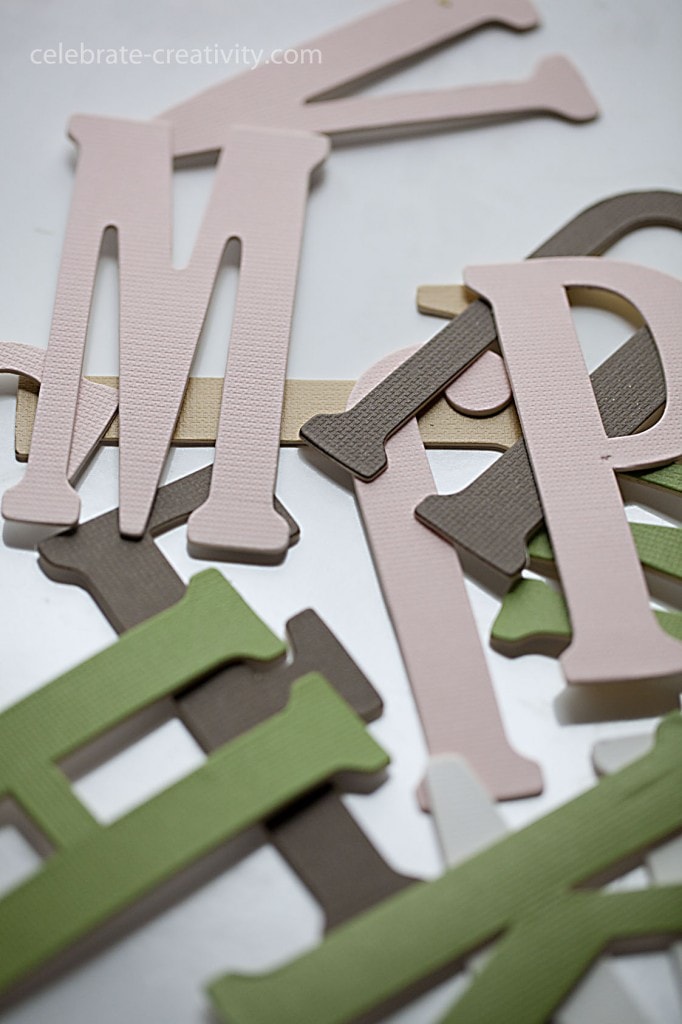
You'll also need some alphabets to trace. I typically use these chipboard letters for my scrapbooking efforts but they're perfect as an outline for the lettering.
Alphabet stencils will also do the trick and you can find those at most crafts stores.
If you do any home sewing, you may already be familiar with double sided applique paper. You can buy it by the yard in the interfacing section of most fabric stores.
Applique paper has a heat-activated adhesive on both sides with one side protected by a thin paper sheet.
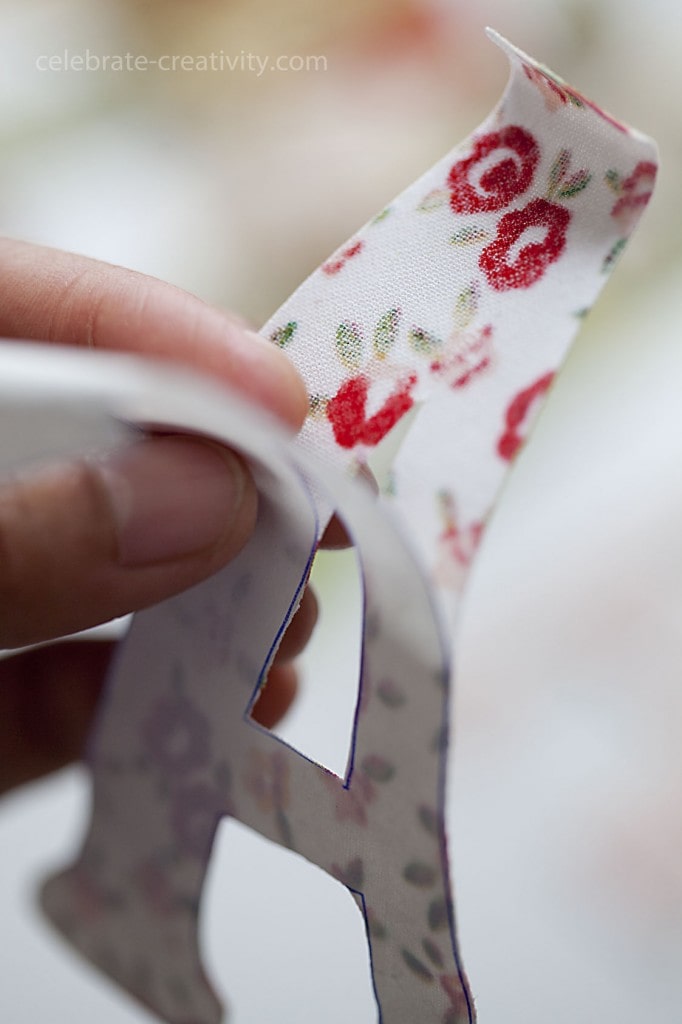
As you can see below, I cut a small piece of the applique (the size of the letter chipboard or stencil) paper and ironed it onto the WRONG (or back) side of the fabric.
This step will deposit a thin layer of adhesive directly to the back of the fabric.
Position the chipboard/stencil over the applique paper to make sure it will fit.
Then, turn the stencil over so that you will end up cutting the alphabet in reverse-image. This ensures that the cut letter will be facing the correct direction on the RIGHT side of the fabric.
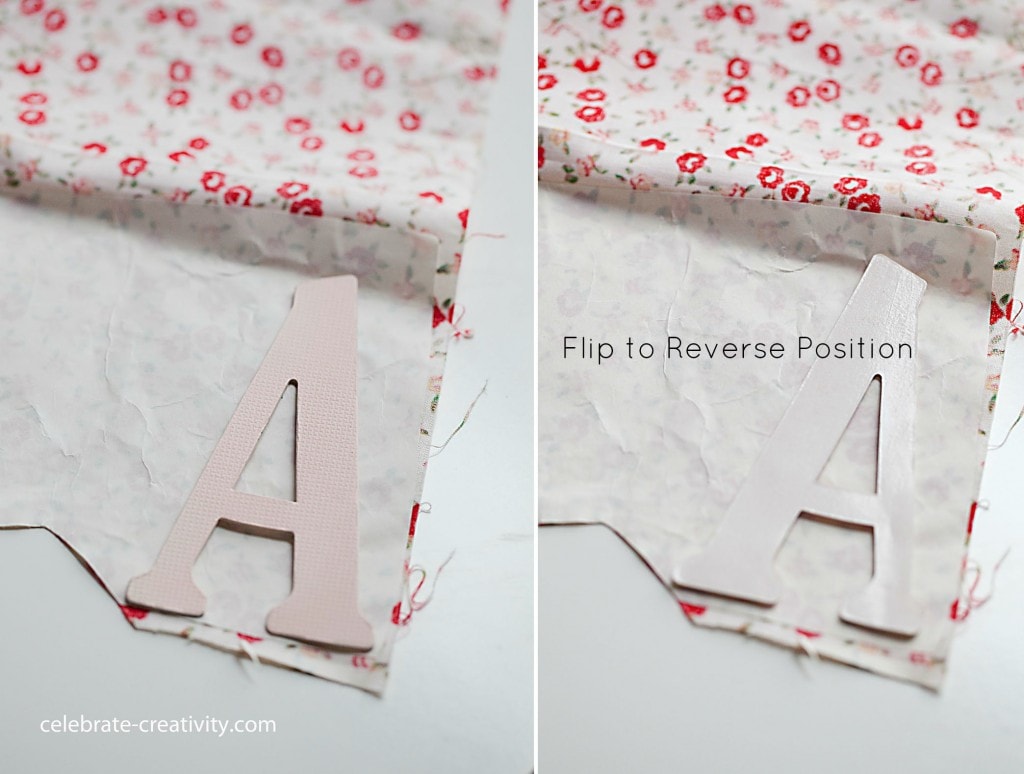
Use a pen or pencil to trace the outline of the letter directly onto the applique paper.
Remember, at this point, you'll be looking at the letter in reverse position.
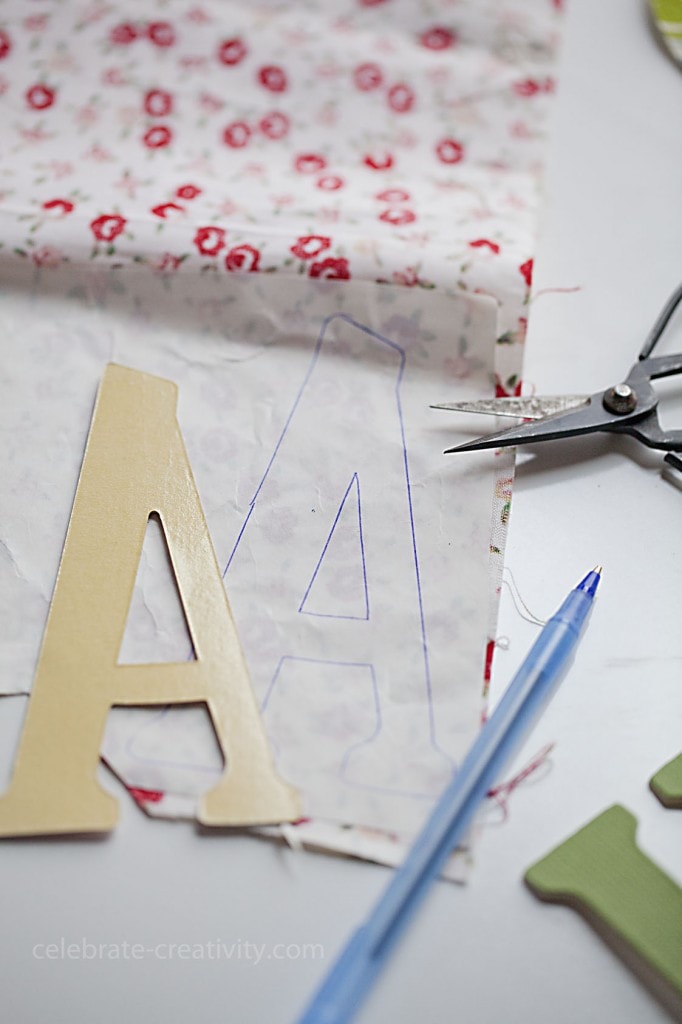
Carefully cut out the letter.
Fine-tip scissors will help you get into tight or narrow corners.
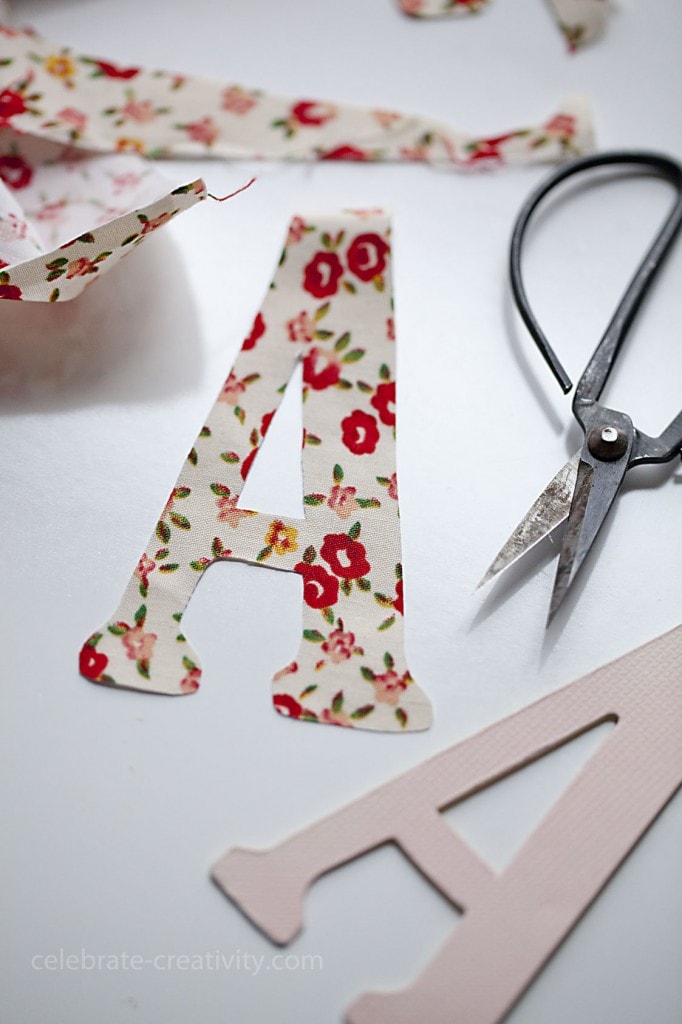
Plan out your words and repeat the same steps to create the desired letters.
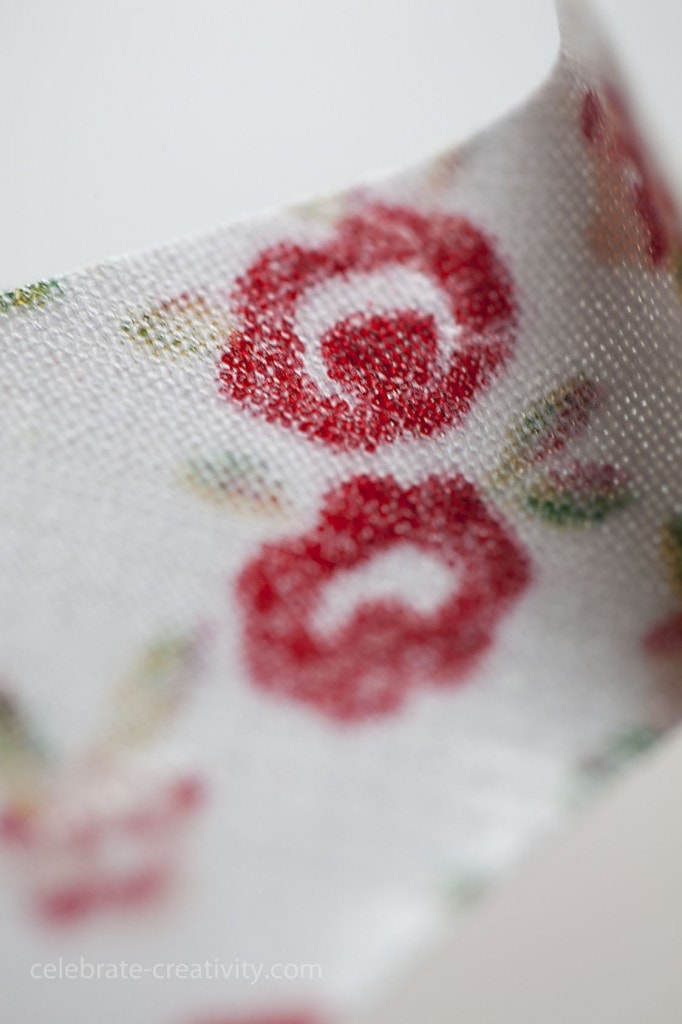
Once all the letters are cut, you'll notice they will still a have a protective paper backing.
Simply peel off this protective paper to expose the other side of adhesive.
I snapped this close up of the back of the letter once the protective paper was removed.
If you look closely, you'll see a slight sheen. That shine is the heat-activated adhesive that will be applied directly to your pillowcase fabric.
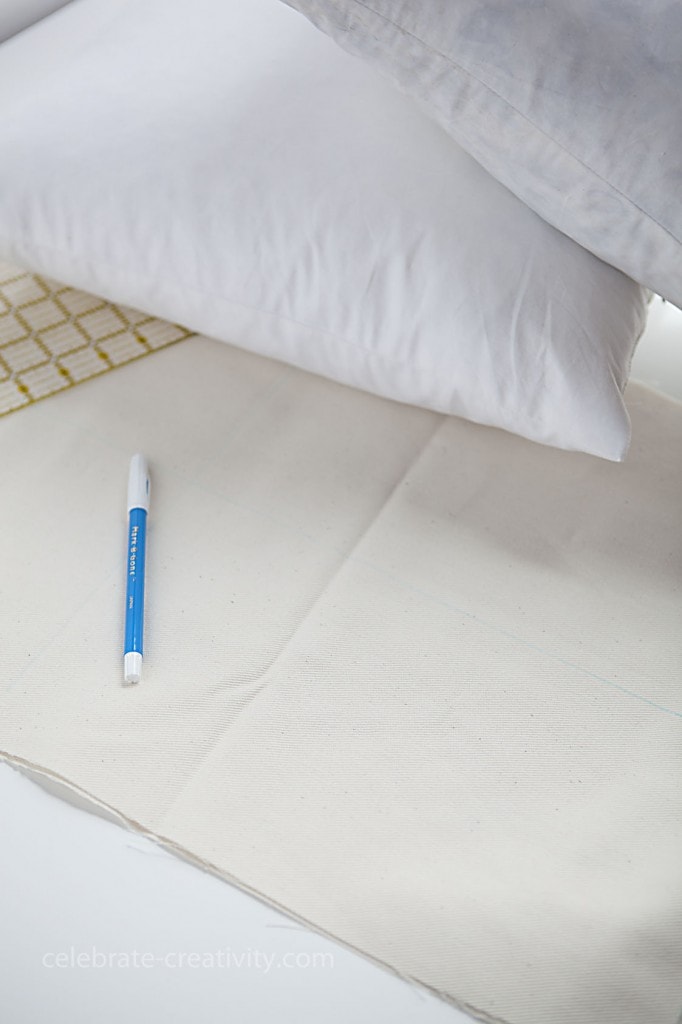
Speaking of pillowcase fabric, decide on the size of pillow cover based on the size of your pillow forms.
Add 1/4-inch on all sides of the pillow measurement for adequate seam allowance.
Cut two pieces of fabric for the front and back of the pillow.
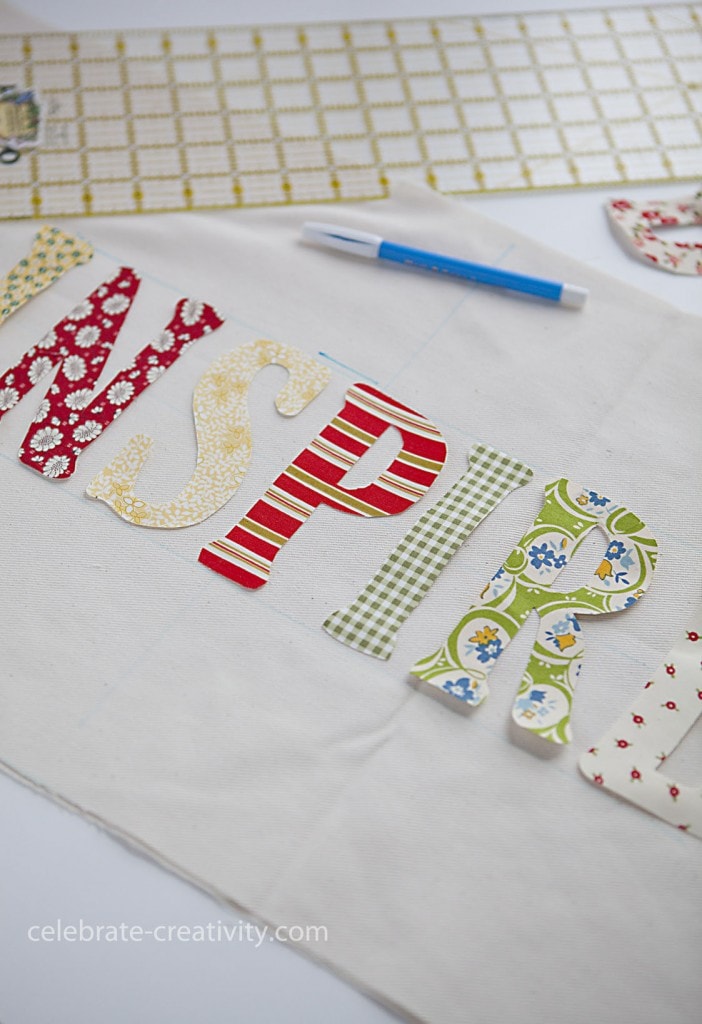
Use a water soluble marker to mark the center of the fabric so your letters will be positioned evenly and in the middle of the pillow.
Line up your letters on the pillowcase fabric.
It may help to also draw water soluble guide lines to indicate the height of the letters for even more precise placement.
Lay the arrangement flat on the ironing board and iron the letters in place.
NOTE: I like the raw edge of the ironed-on letters but if you want to make the letters a little fancier, sew a zig-zag/satin stitch around the outside edge of all the letters.
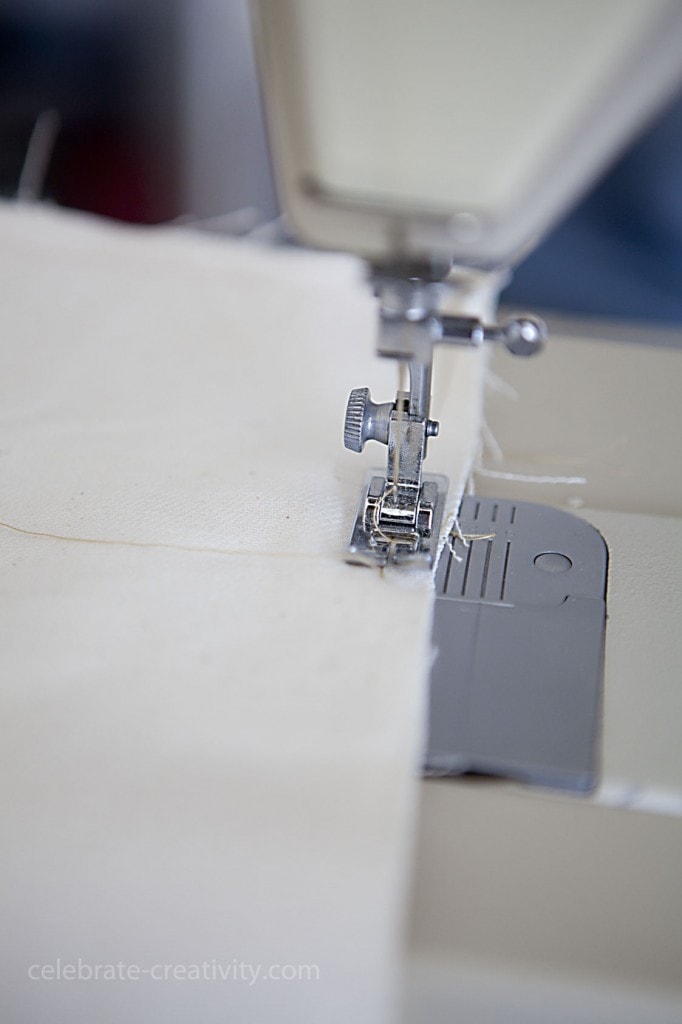
Once all letters are securely in place, place the right sides of the pillowcase fabric together and stitch 1/4-inch seam all the way around.
Make sure you leave an opening along the bottom edge that's large enough for your pillow form to fit inside.
Once the pillow form is inside the case and all the corners are smoothed out, just slipstitch the bottom edge-opening to close it.
Then, add the pillows to a favorite chair or sofa for some much-need early spring color.
Once you start working with that applique adhesive, it will be hard to stop.
Consider making a few pillows for gifts or personalizing a few with the names of kiddos in your household. Trust me, they'll love seeing their names on their own throws.
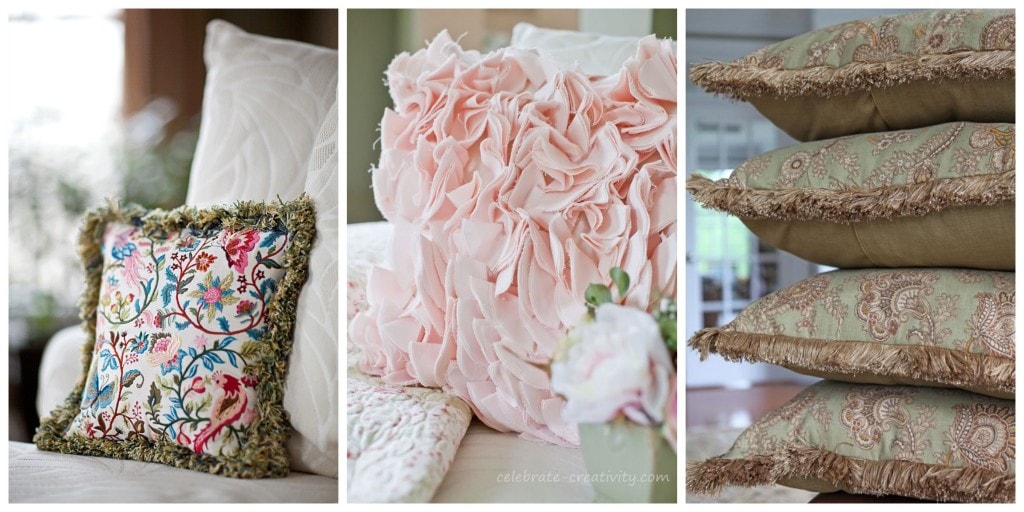
Throw pillows are among the easiest DIY home décor projects ever.
I've made a ton of pillows over the years and if you'd like to see some of my variations, check out the project links below.
Machine-Embroidered Jacobean Pillow
Fearlessly Fringed Pillow Project
Justin
I have tons of pillows on my bed, but only use one. It’s be great find another brand that will foster a good night rest.
Jamie
These are so adorable!!!
Hugs, Jamie
sandi Allen
Love, Love, Love these!
Thank You forsharing your tutorial.
Sandi
Emily
Wow! That first picture just took my breath away. I love these pillows so much. They look like something I may even be able to pull off. Thanks for sharing!
Debra@CommonGround
oh wow, I'm totally crushing on these adorable pillows, just wish she had an Etsy shop!
Lisa at celebrate creativity
Thanks Debra, I don't have an Etsy shop but that is definitely something to add to my "things to consider" list.
Amy@Little Dairy on the Prairie
These are so cute! I'm the least crafty/creative person ever but I think I am going to try making some of these. I think they would be adorable in manly patterns and words for my boys rooms! Thanks for the tutorial!
Lisa at celebrate creativity
Hi Amy, I'm so glad you're inspired to try making some of these for your boys. I know they'll love them.
Linda J
Now, that was good! Great detailed instructions, very clear and concise. I'm gonna do this project NOW! I love it! How happy it makes me feel. You succeeded well in your *inspiration*! Thanks.
Lisa at celebrate creativity
Thanks Linda!
There are so many possibilities with this project and I'd love to know how your pillows turn out.
Good luck!