

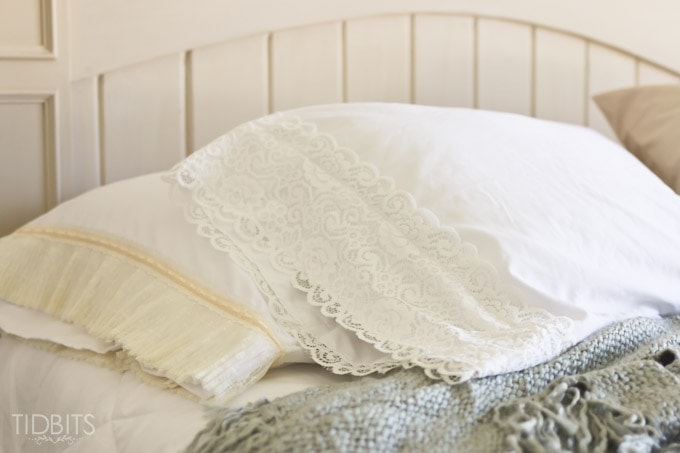
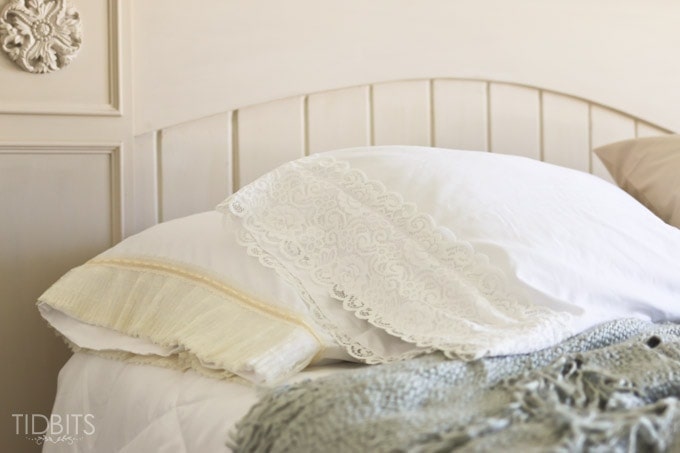
Hello again! It's Cami from TIDBITS, and I'm here to share a little glimpse of our progress in our master bedroom makeover, as well as a simple tutorial for adding some charm to a basic white pillowcase.
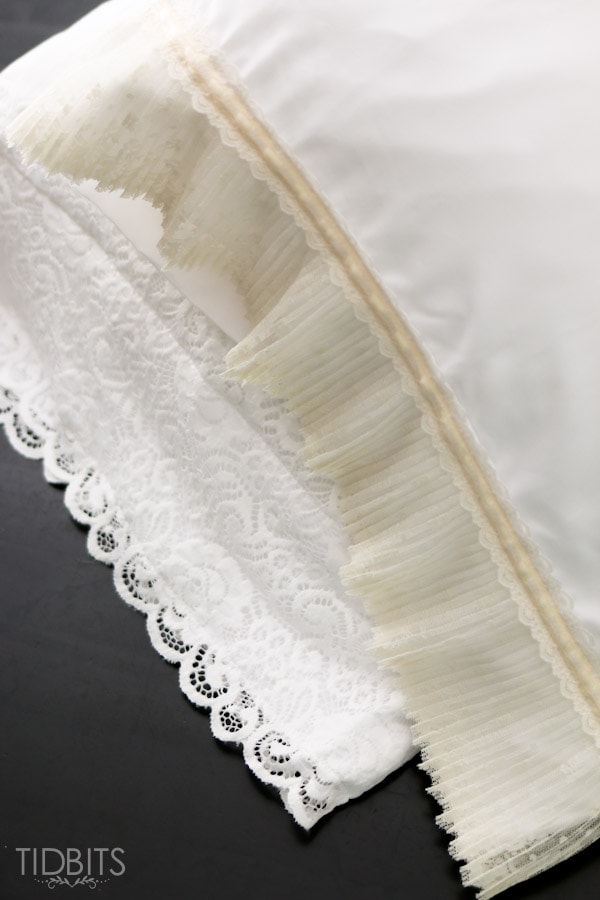
All you need is a pre-made pillowcase (any color or type) and some lace - and a few stitches later you have a lace pillowcase!
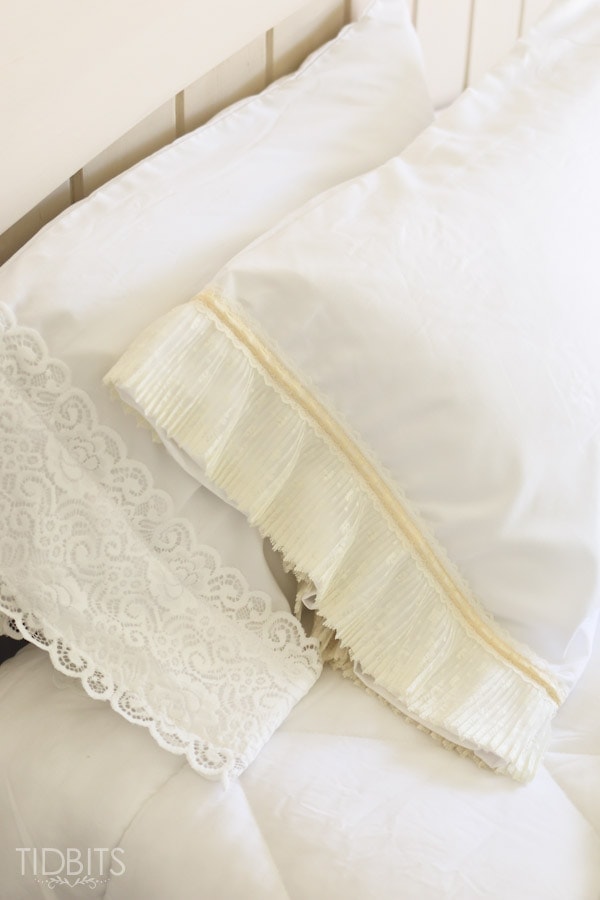
I've always admired those pillowcases with hand crochet edgings, and the touch of vintage charm it adds to a bed. However, I have yet to learn the trade of crocheting (and I don't think I will any time soon), so I tried to think of other ways I could add something special to our bedding.
I headed to hobby lobby and saw they had a beautiful selection of lace trims, and knew it would be a super quick and easy thing to stitch them to some pre-made white pillowcases we already had.
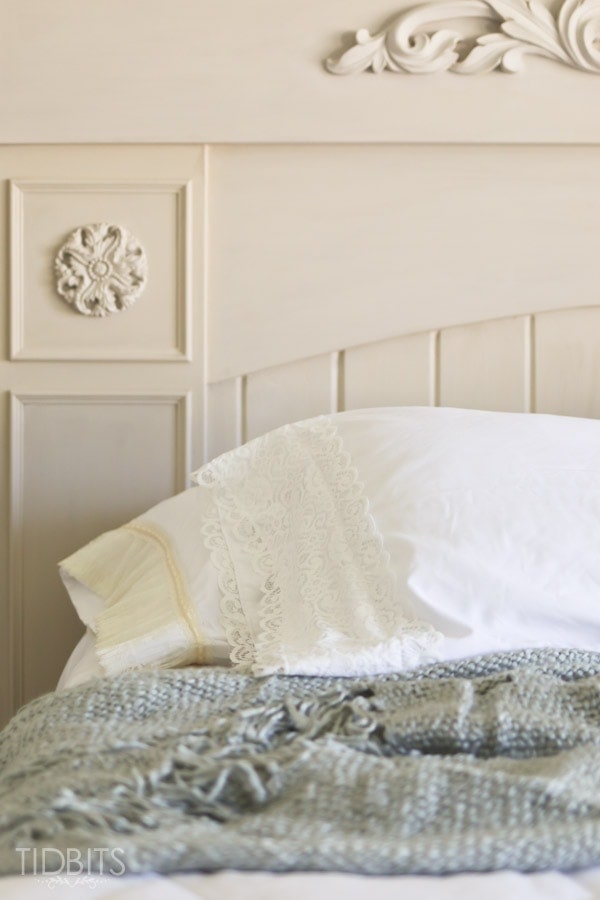
My husband just finished building our mantel headboard, which turned out so lovely that I knew a plain white pillowcase would feel out of place. I would love to have you head over to TIDBITS, where I'll show you more about the bed and the progress we've made so far in this space.
If you would like the instructions for adding lace to your pillowcase - keep on reading!
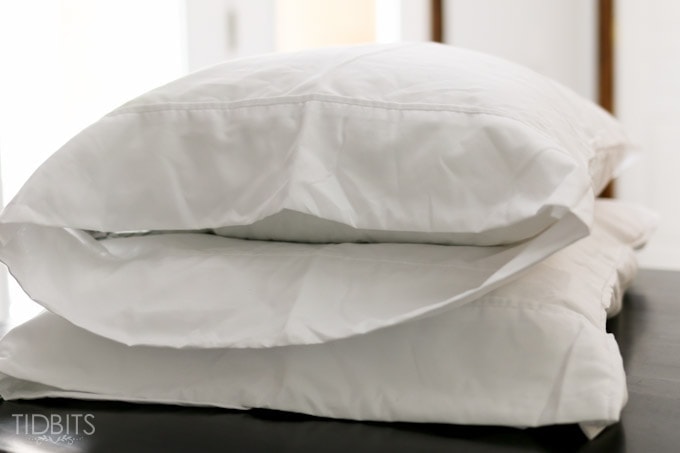
First, be sure you have a pillowcase that has a little hang on the edging after the pillow is inserted.
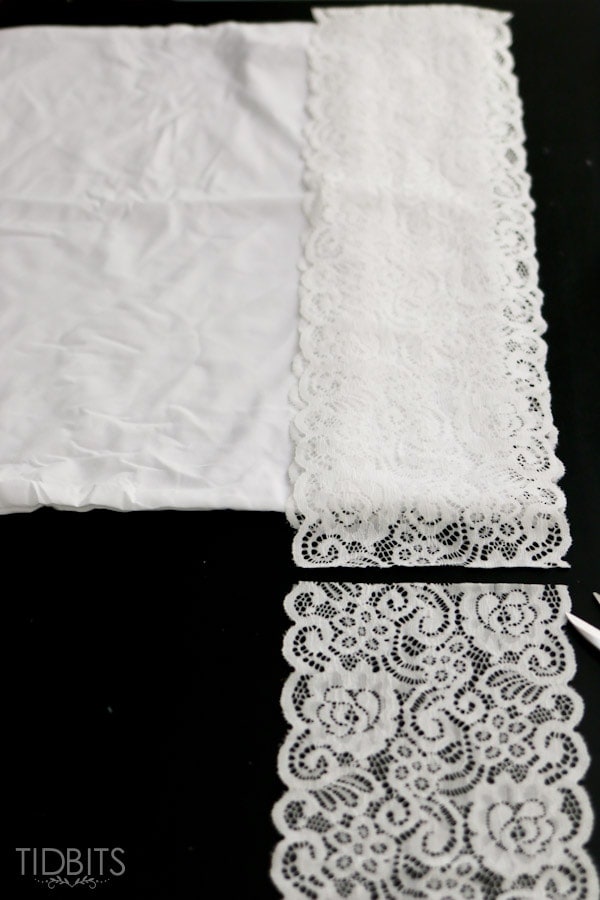
You will need about 1.5 yards of lace for a standard size pillowcase. It will leave you with a little extra lace, but 1 1/4 might not be enough.

Figure the exact amount of lace you will need by laying the lace on the pillowcase edging with about an inch extra of overhang.
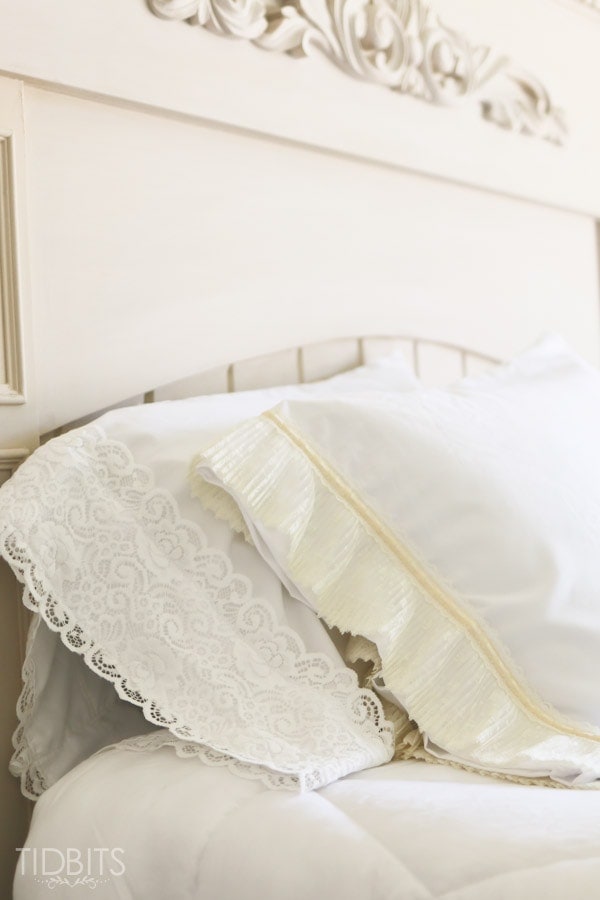
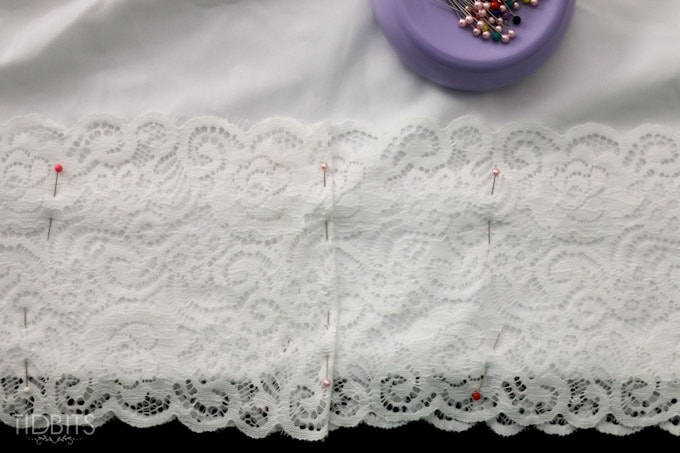
Next, you will pin the lace exactly in place where you want it stitched down. You can really start your lace edge any where, just be sure to fold the raw edge of your lace over once and pin it down so you have a nice clean edge.
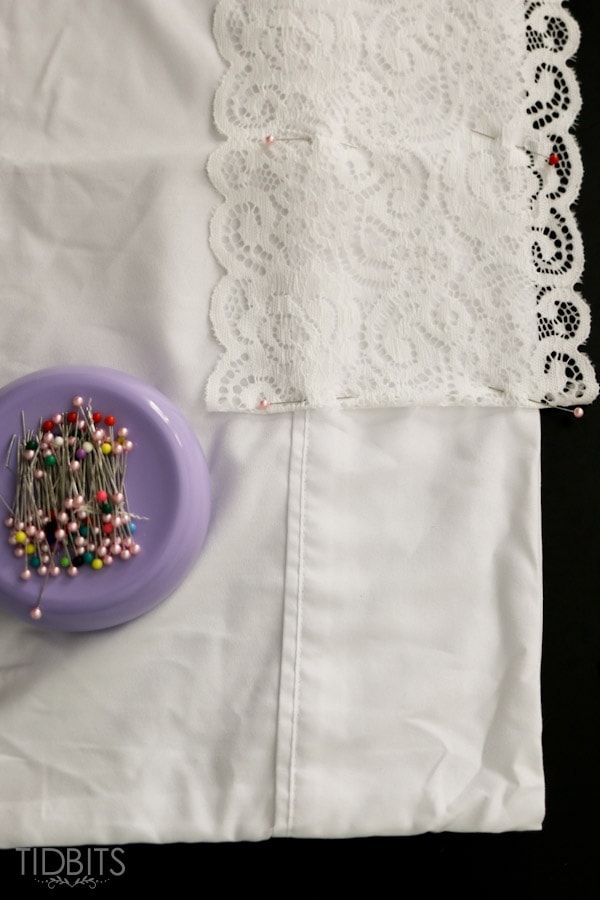
Once the other end of the lace meets up with the previous end you pinned down, fold the raw edge of the lace down again and pin it over the other edge. Hopefully the picture below helps to show that step clearly.
Finally, you will be stitching your lace to the pillowcase. The type of lace you bought really determines how you will stitch it down and where you want it secured. Simply start at your lace folds and sew all the way around.
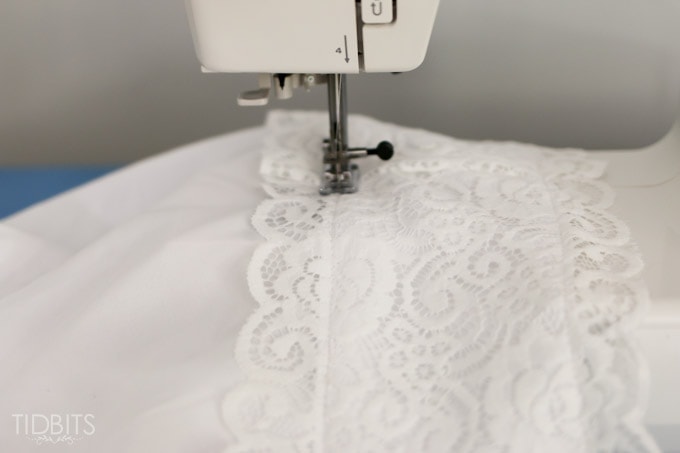
It really is as easy as that! You may run into the lace shifting or bunching, but remember that pinning as much as possible can really helps with that. Or perhaps you can try not pinning at all and just place your lace down as you sew. That worked best for the pleated lace below.
I hope you have enjoyed this tutorial, and feel free to follow me along as I sew more bedding pieces and finish up our master bedroom!
Here are some other bedrooms we have finished in our home so far.
Getting our kids rooms completed was apparently more important than our own 😉
Here is the space where our 2 youngest girls sleep and play. See all the details on this post, HERE.
Next was our oldest daughters bedroom, where we turned what should be a formal living room into her bedroom. It is probably my favorite room in the house so far.

All the details, HERE.
Or you can just take a glance at all the fixed up spaces in our home by clicking HERE.
Can't wait to add the master bedroom to the line up! It has been a long time coming.

Thanks for reading!
Veronika | Tickled Pink Confetti
This is so lovely! I always love vintage style, although I have to admit I do deviate a little in the past few years to accommodate my other half's taste - eclectic, more geometric lines. But I always try to find ways to bring lace into my home. I just loooove the sheer romance of this project and your space. Thank you very much for sharing. Kind Regards, Veronika | Tickled Pink Confetti
Sarah R.
Gorgeous! What a lovely little sewing project- thank you so much for linking up at
Kathleen Berlew
These are gorgeous! You've inspired me to beautify my boring pillowcases.
Kristi
Love this! I am drawn to projects that require just a bit of sewing..and really this could be done with a variety of borders..not just lace! Great idea! The rooms in your house are so cozy and cute!!
Kristi
oops..I didn't know my sister had already commented on this post..I guess we both like your style!! 🙂
cynthia
This is perfect timing as I am wanting to do this for my bedroom suit that I just inherited from my aunt, perfect!! thank you for sharing.
Lorey Lyons
What a simple but gorgeous alteration! I love how much softness and class it lends to plain cases!
Thanks for sharing!
Kelli
Beautiful! A great touch of charm and vintage. This was way simpler than I expected. I do a lot of sewing, but I have never sewed with lace. This would be a great project to start with. Thanks for sharing!
Lynn
What a great idea! Adding that trim to my daughter's pillows would finish her room perfectly. Thanks for sharing. Visiting from Something to Talk About link party.
Gina
Great tutorial
Emily
The pillow cases are so sweet. And I love your daughter's rooms....makes me wish I had a girl 🙂
Michelle Mortensen
I love it! My daughter's bedding is "shabby chic" white. The duvet and sham have lace-like details, but the sheets and pillow cases are just plain. Not anymore! Thanks for the tutorial.
Best,
Michelle from simplysantabarbara.blogspot.com
Shawnna
This is so cool!! Love it!